Installing a Junkyard Turbo in my 1984 Volvo 245
Latest Update: 7/1/20
Intro
This is a build log that will explain how I added a turbocharger to my existing engine. I will include what I've spent on parts, identify mistakes to avoid, and hopefully provide a comprehensive guide for anyone planning a similar project.
Note:
Amazon links are affiliate links. Other sites are not. I've only linked things I've actually bought and used myself. All of the Amazon links donate 0.5% of the purchase price to the charity of your choice through Amazon Smile. If you haven't signed up, it'll ask you to pick a charity before redirecting you to the product. Neither of these features changes the price you pay.
B23 Engine with a B230 Turbo
We started the turbo build at 300,500 miles on the car. As far as I know, this is the original engine, a 1984 B23F (Wikipedia Link). Since the car came with Volvo's M46 manual transmission, the compression should be 9.5:1 and the stock power and torque numbers would've been 113hp at 5400 RPM and 136 ft-lbs at 2750 RPM. As far as I know, 1983 and 1984 were the only two years Volvo used Bosch LH2.0 fuel injection, switching to LH2.2 and then LH2.4 in the latter years of the 240. 1984 was also the last year before Volvo switched to the B230, featuring slightly different internals. I'm far from an expert, just summarizing info from around the web. I bought the car in 2018 with 282,000 miles, and the 18k we've put on it since have certainly not been easy miles. Prior to the turbo, it wasn't fast enough to get out of its own way. It wasn't powerful out of the factory, and the 300k miles after that certainly didn't increase the power. What sealed the deal on adding the turbo was struggling to get up hills off-road in Baja — we had the clearance, we just didn't have the power to make it up the steeper hills (Note: we could've also fixed this with lower rear end gearing, a lower first gear in the transmission, or an add-on transfer case, but a turbo seemed like the easiest, cheapest, and most well-traveled path).
The turbo journey started on July 4th, 2019. Hans, an excellent friend and accomplished amateur mechanic, accompanied me to the Tumwater, WA junkyard to pull a turbo from a Volvo 740 turbo. Pick-n-Pull is spotty about labeling turbo models, so I made sure to check the VIN before driving out to the junkyard. This was actually my second try at finding a junkyard turbo. Some Thursday in March, I called another Pick-n-Pull about a turbo Volvo and confirmed hadn't been crushed — but by the time I got there on Saturday, the top had been crushed/cut off and the car was used as a bin for other trash.
In addition to talking to friends and the Turbobricks Facebook group, this Turbobricks post by 740atl was incredibly helpful. I'd advise reading that post all the way through several times before embarking on this journey. If for whatever reason that thread is down, here is a PDF Link.
Disappointment
 This car had been completely mined for parts. The only potentially useful part was an intercooler pipe, but I left it behind, I figured I could get the whole setup at once. Special shout-out to the employee in the picture above. who yelled at me for climbing into the area with said crushed car to look for parts, where I wasn’t supposed to be.
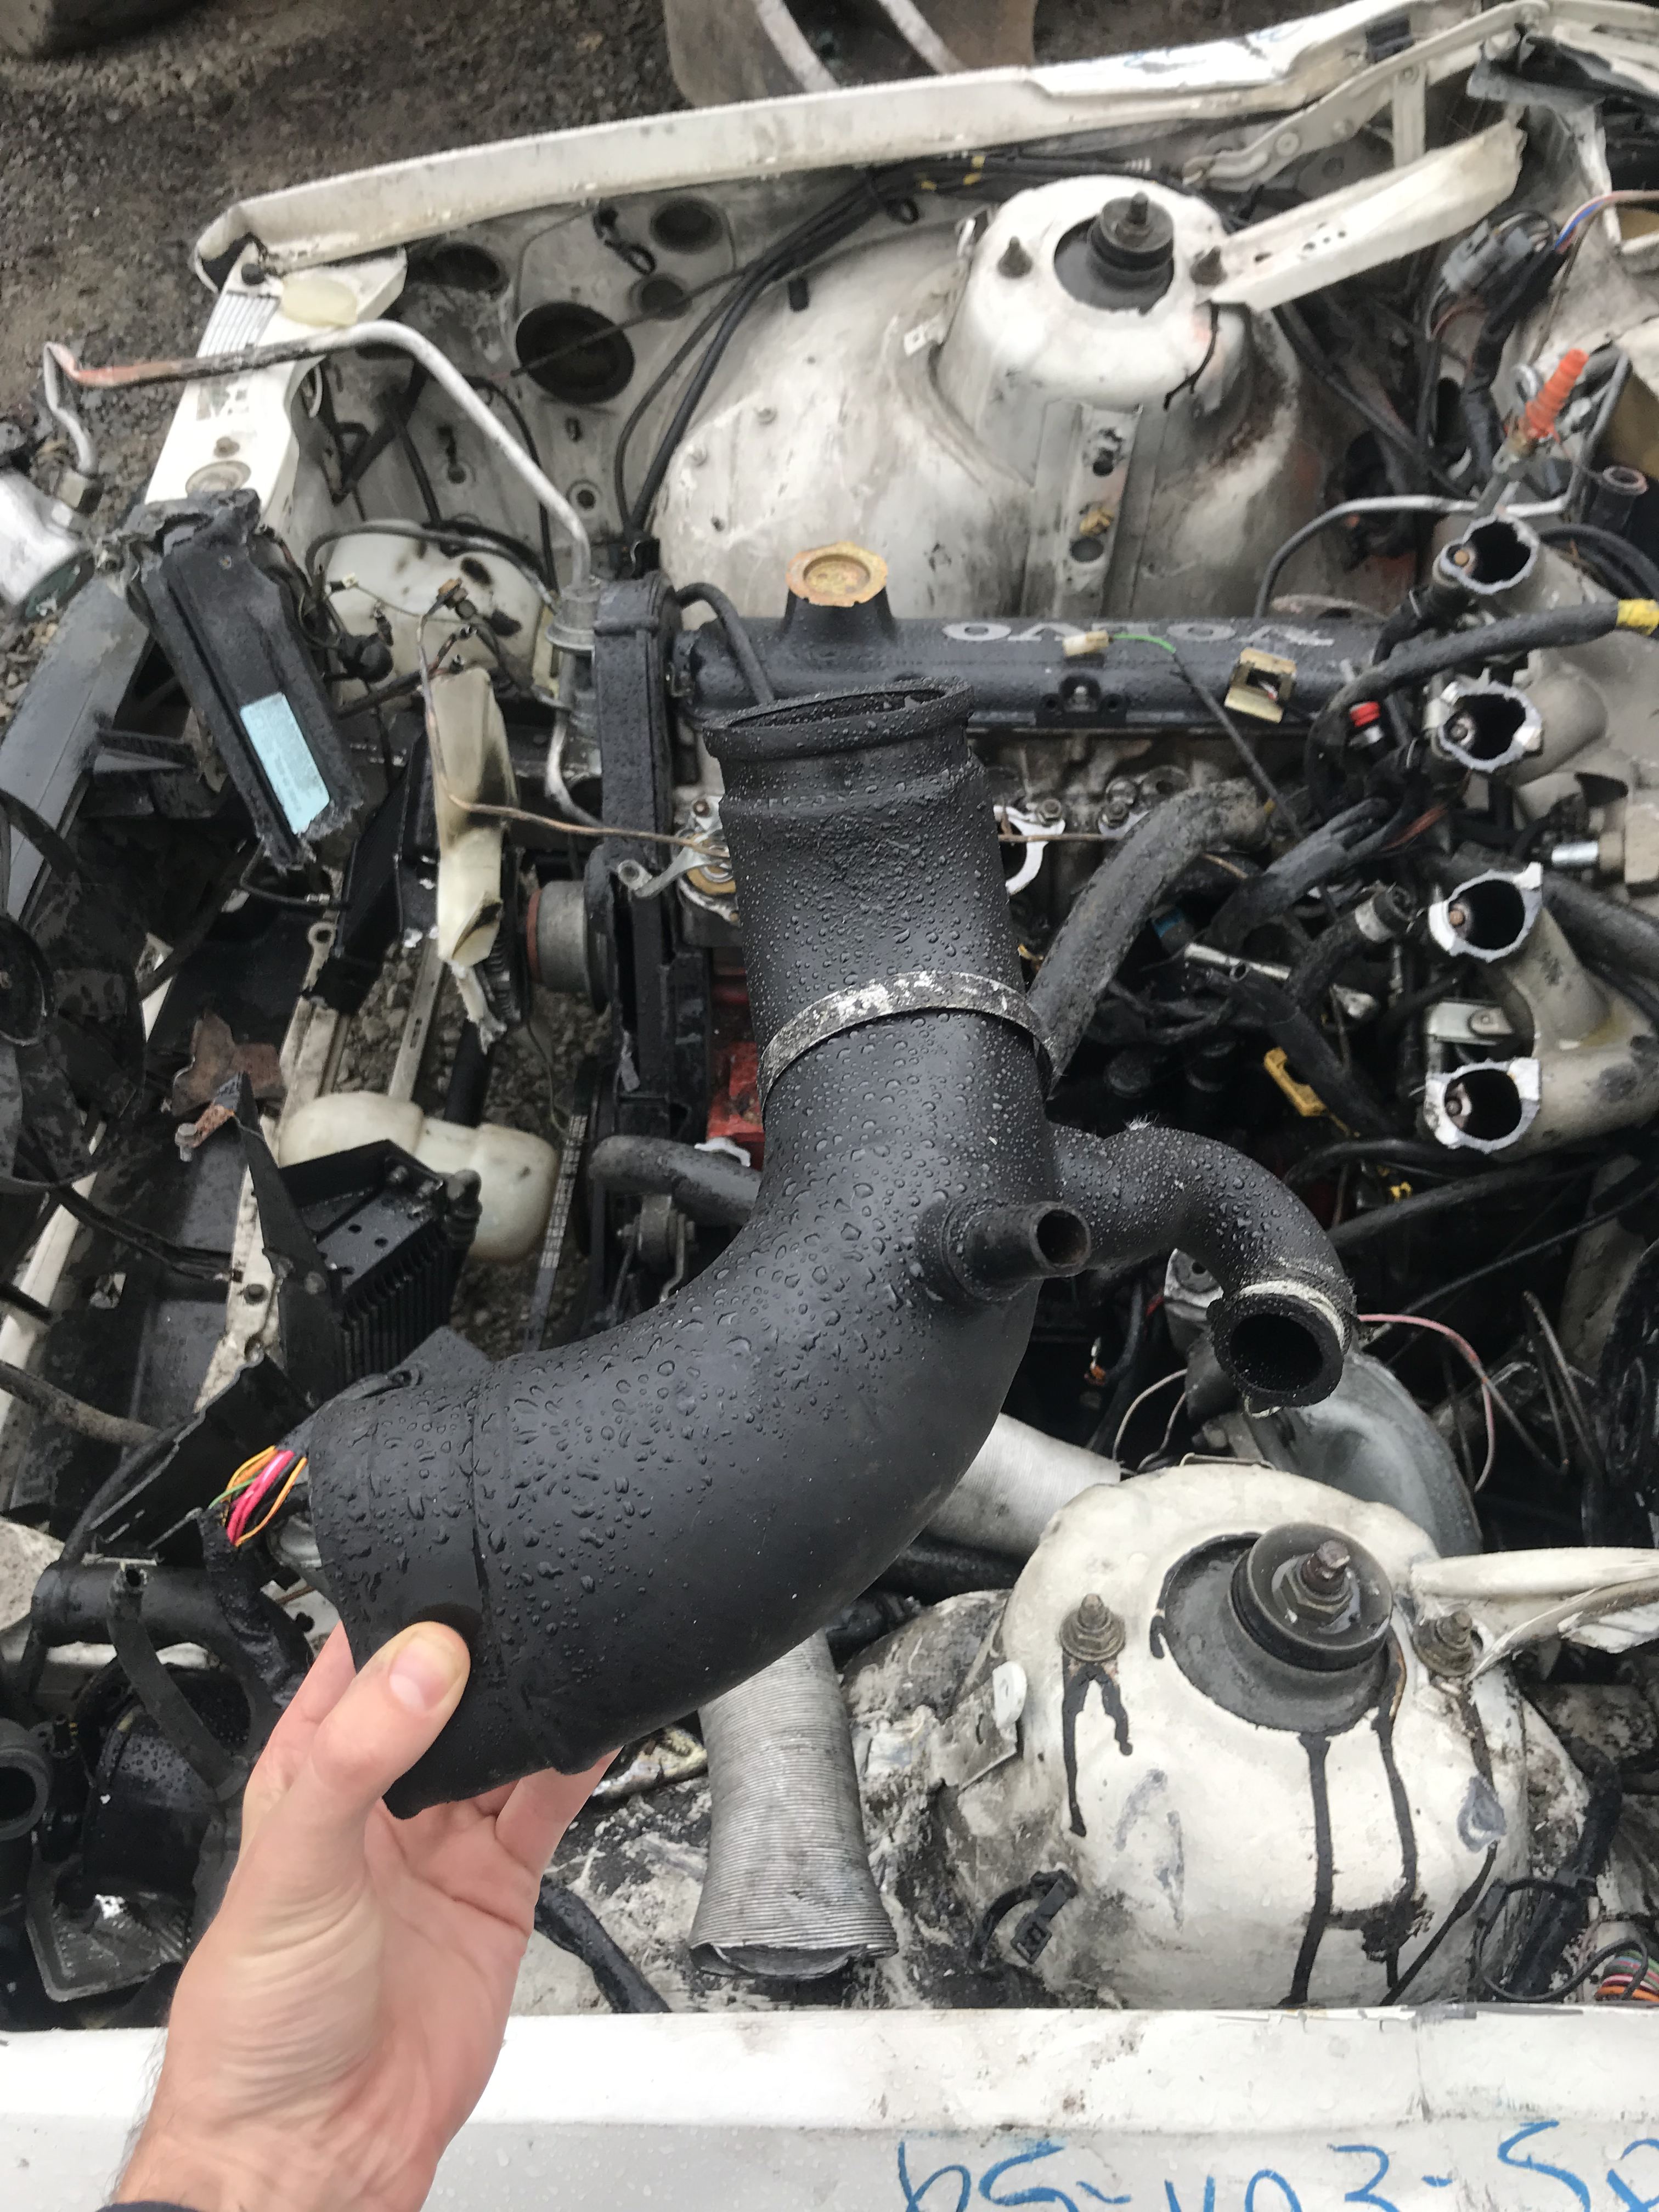
The second Pick-n-Pull trip in July was much more successful. I nervously opened the hood of this second Volvo 740 turbo to find an untouched engine. Success at last!
Success!
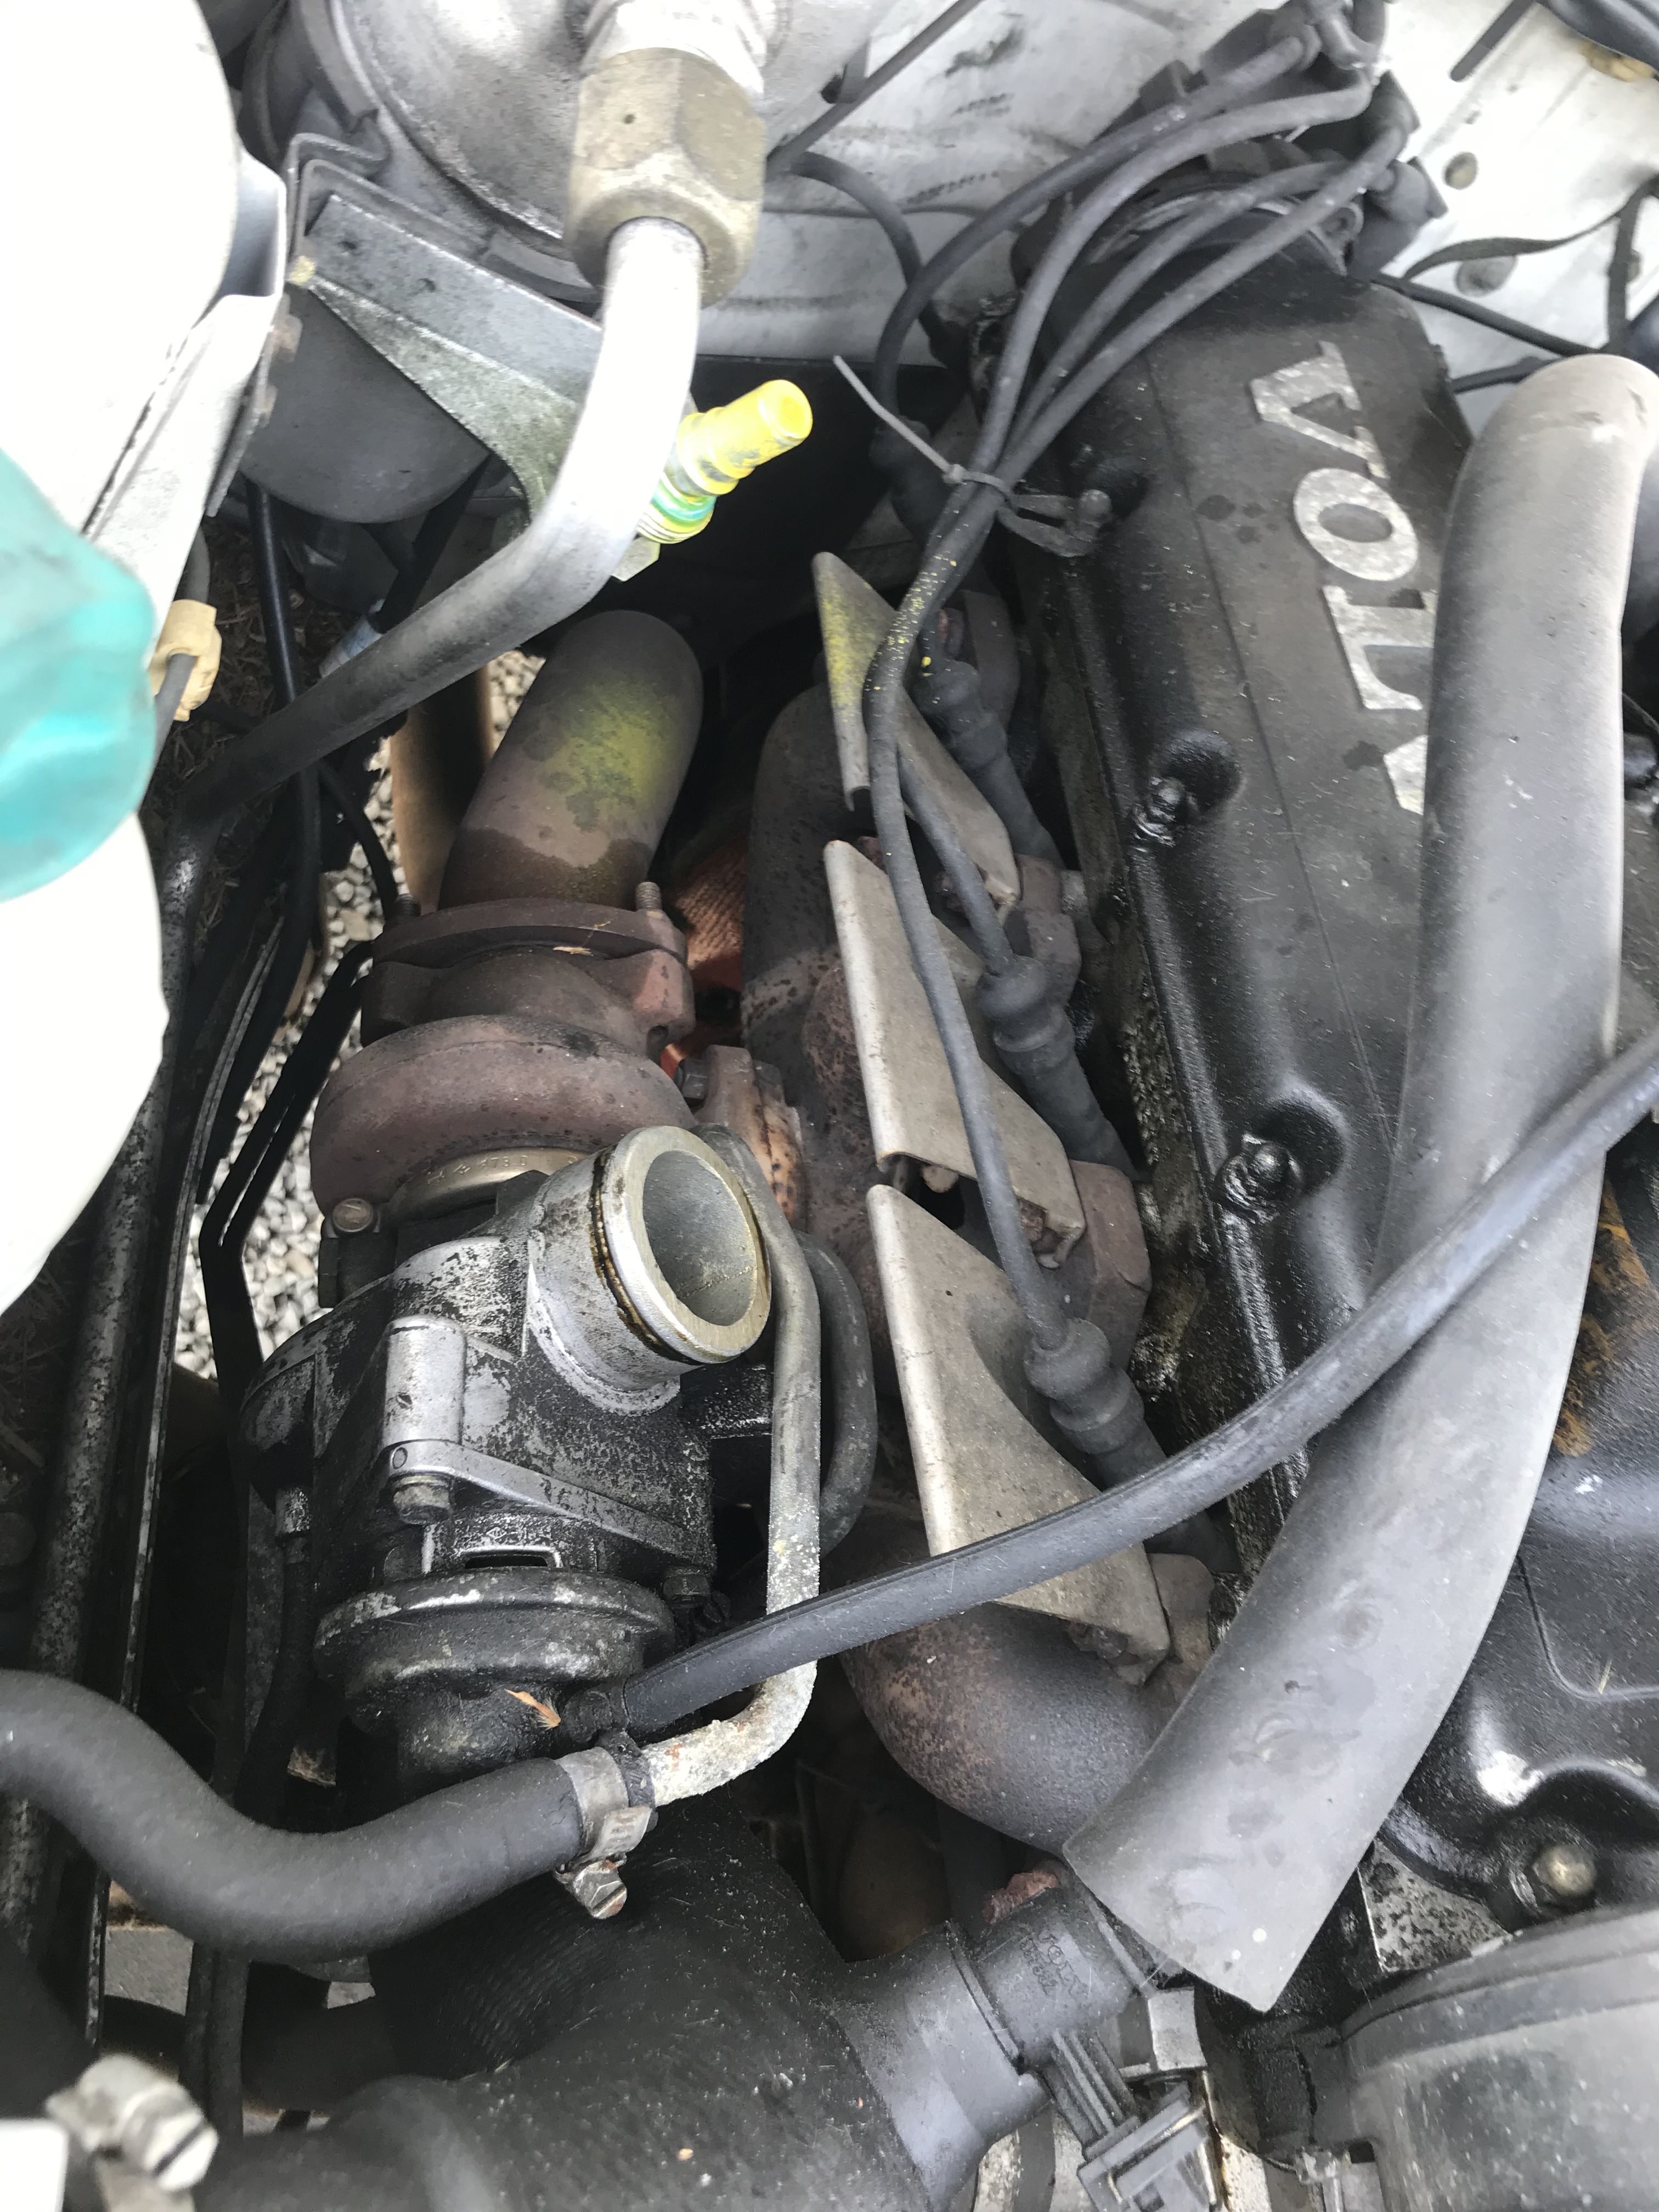
Hans and I proceeded to pull the following from the donor 740:
- Turbo, including the attached exhaust manifold, downpipe, oil hard lines, coolant hard lines
- Intercooler and associated hard & soft piping
- Oil cooler and input fittings, cutting the hoses. This was a mistake, as I detail later on – I should've taken the oil cooler, hoses, and the oil filter adapter plate from the donor car.
- Fuel rail and fuel injectors (we ended up not needing the latter, as explained below I used high impedance injectors which make it easier to wire)
- LH2.4 Fuel Computer and EZK Ignition Computer. We used neither, changing an early engine to LH2.4 is daunting because adding a crank position sensor requires drilling and tapping holes in the engine block.
We didn't pull the oil cooling adapter/oil filter relocation because I didn't know how easy it was to remove from the car. This was again, a mistake.
The total cost for the parts from Pick-n-Pull was $250 including about $50 core charges (none of which I got back), because we went on the 4th of July, which was a half-off day. A "normal" day, the parts would've been $500. In my opinion, that's a bit steep for junkyard turbo parts off of a 233k mile car - we could've gotten the price down a bit by being smarter with the things we got, i.e. getting fewer things and getting more of the things we needed, but going on a 50% off day was key.
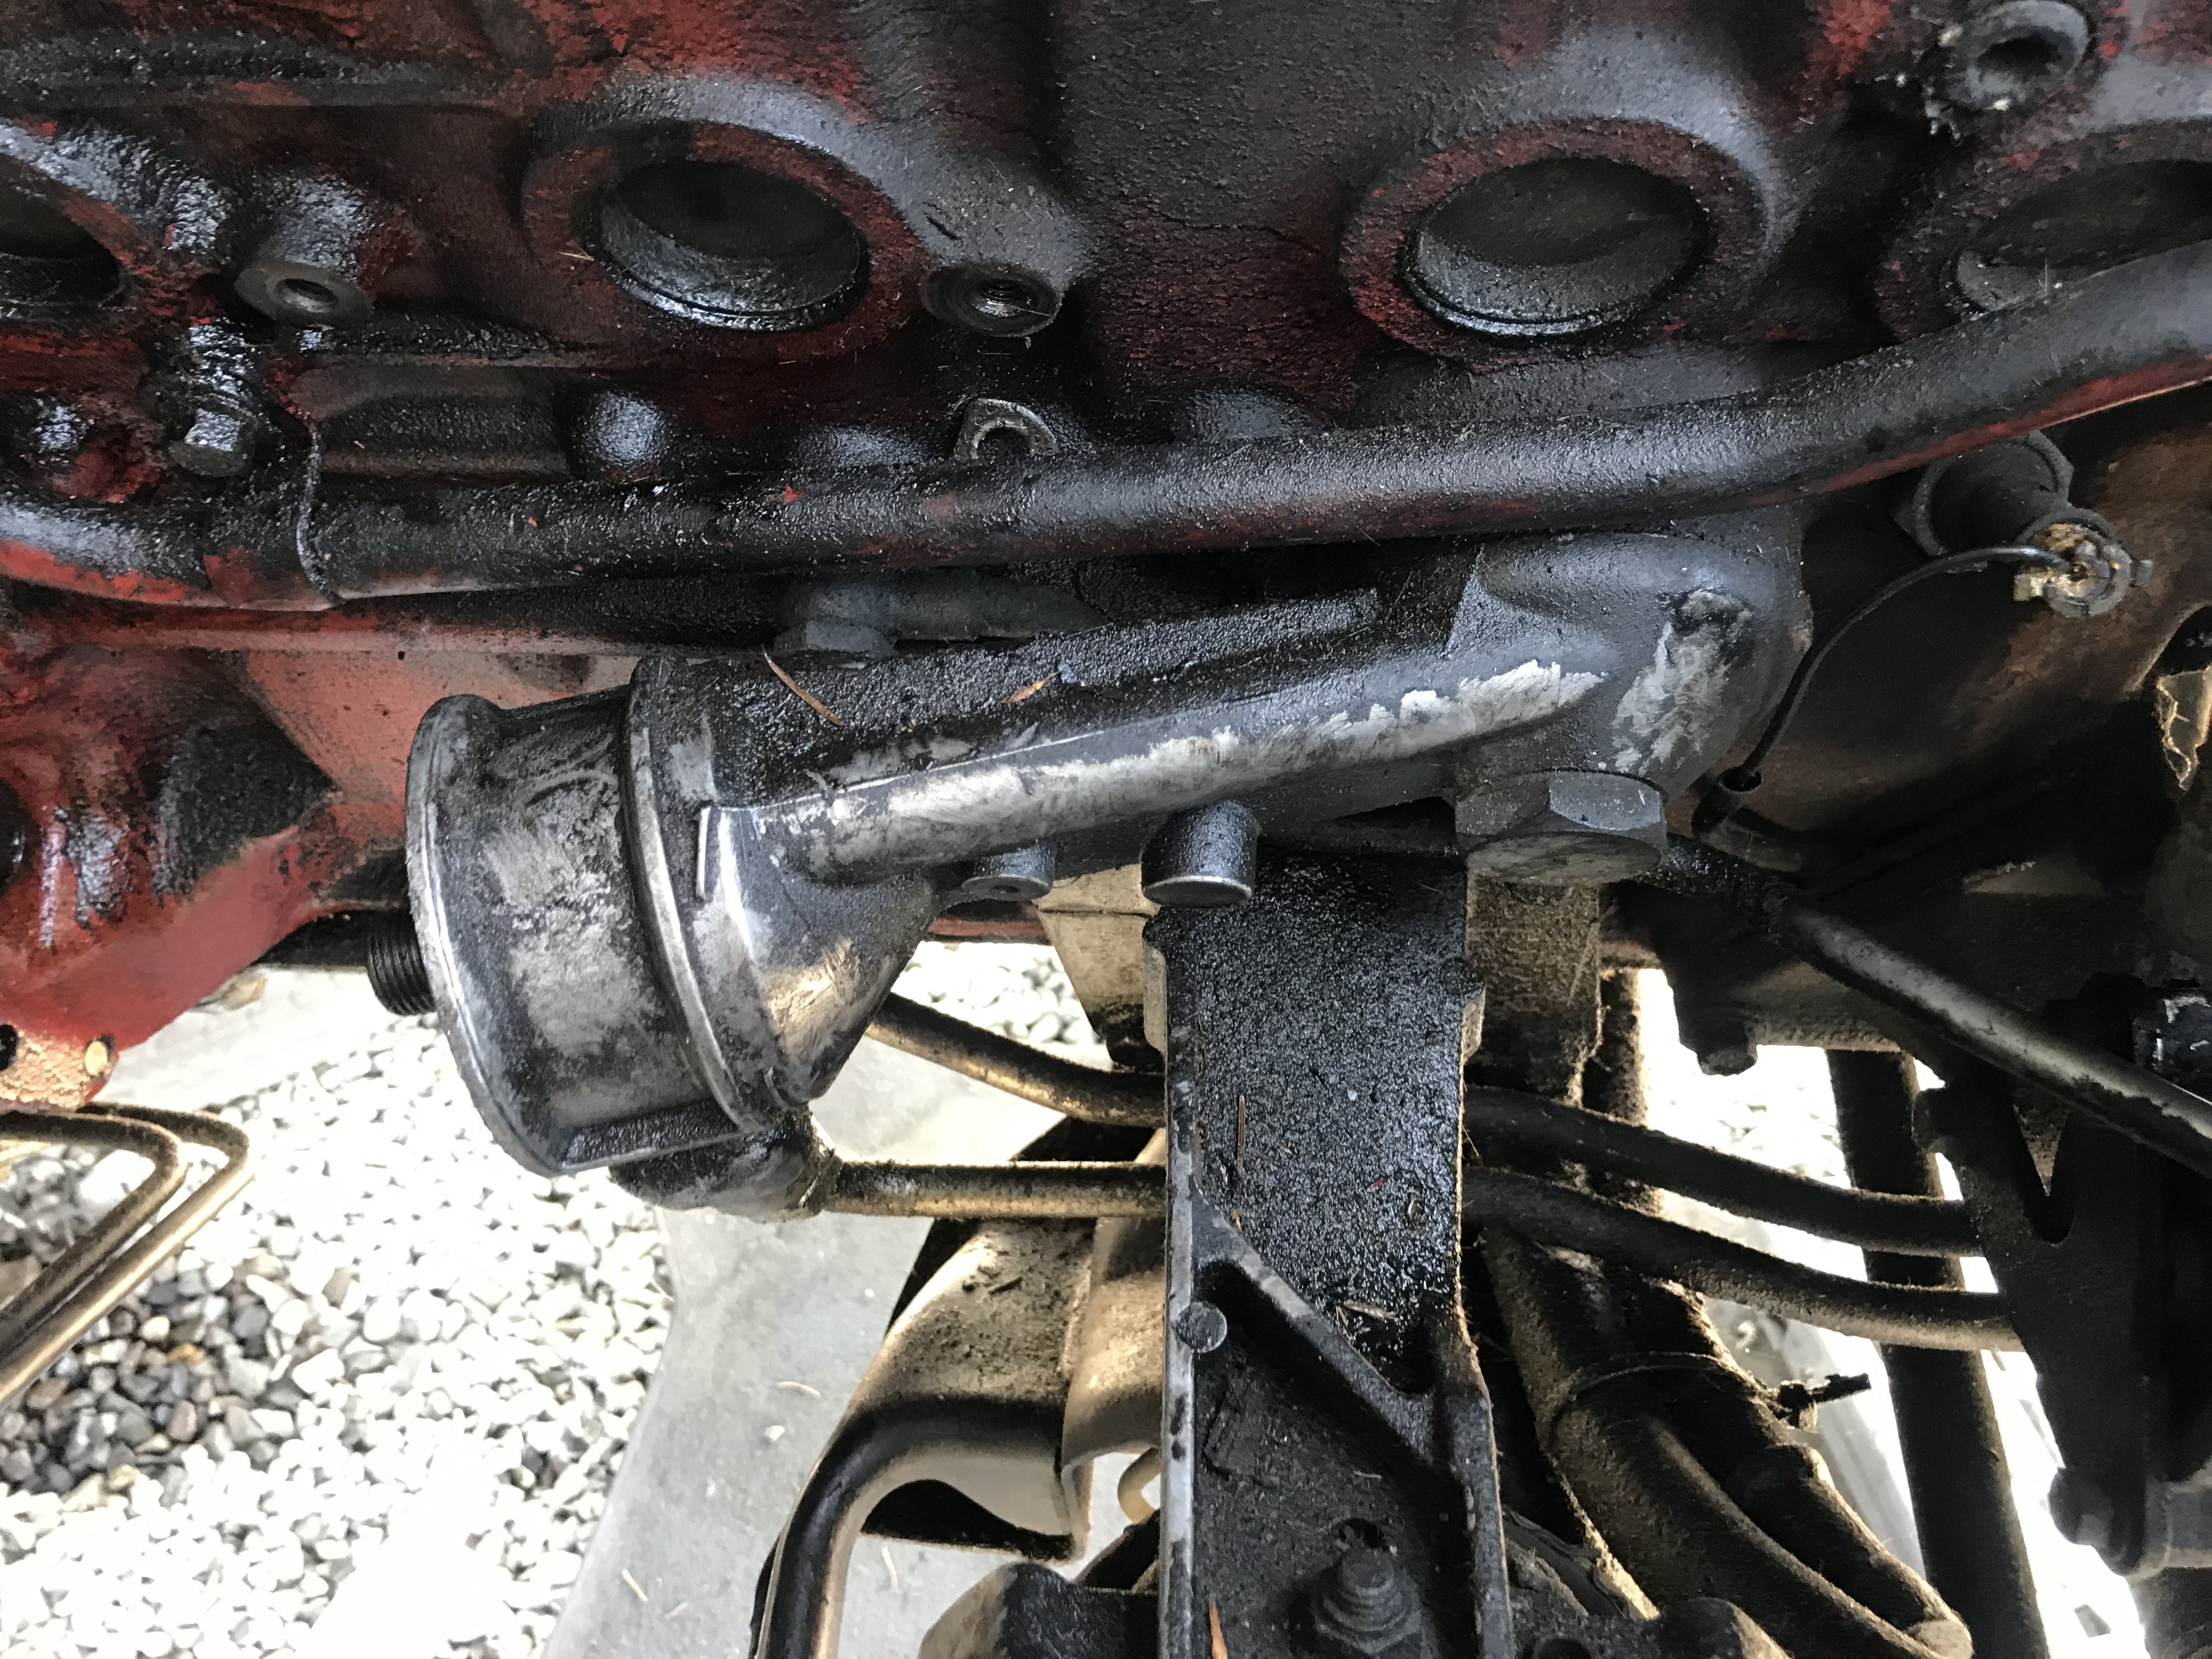
Oil cooler adapter
We left this behind from the donor car, but that was a mistake.
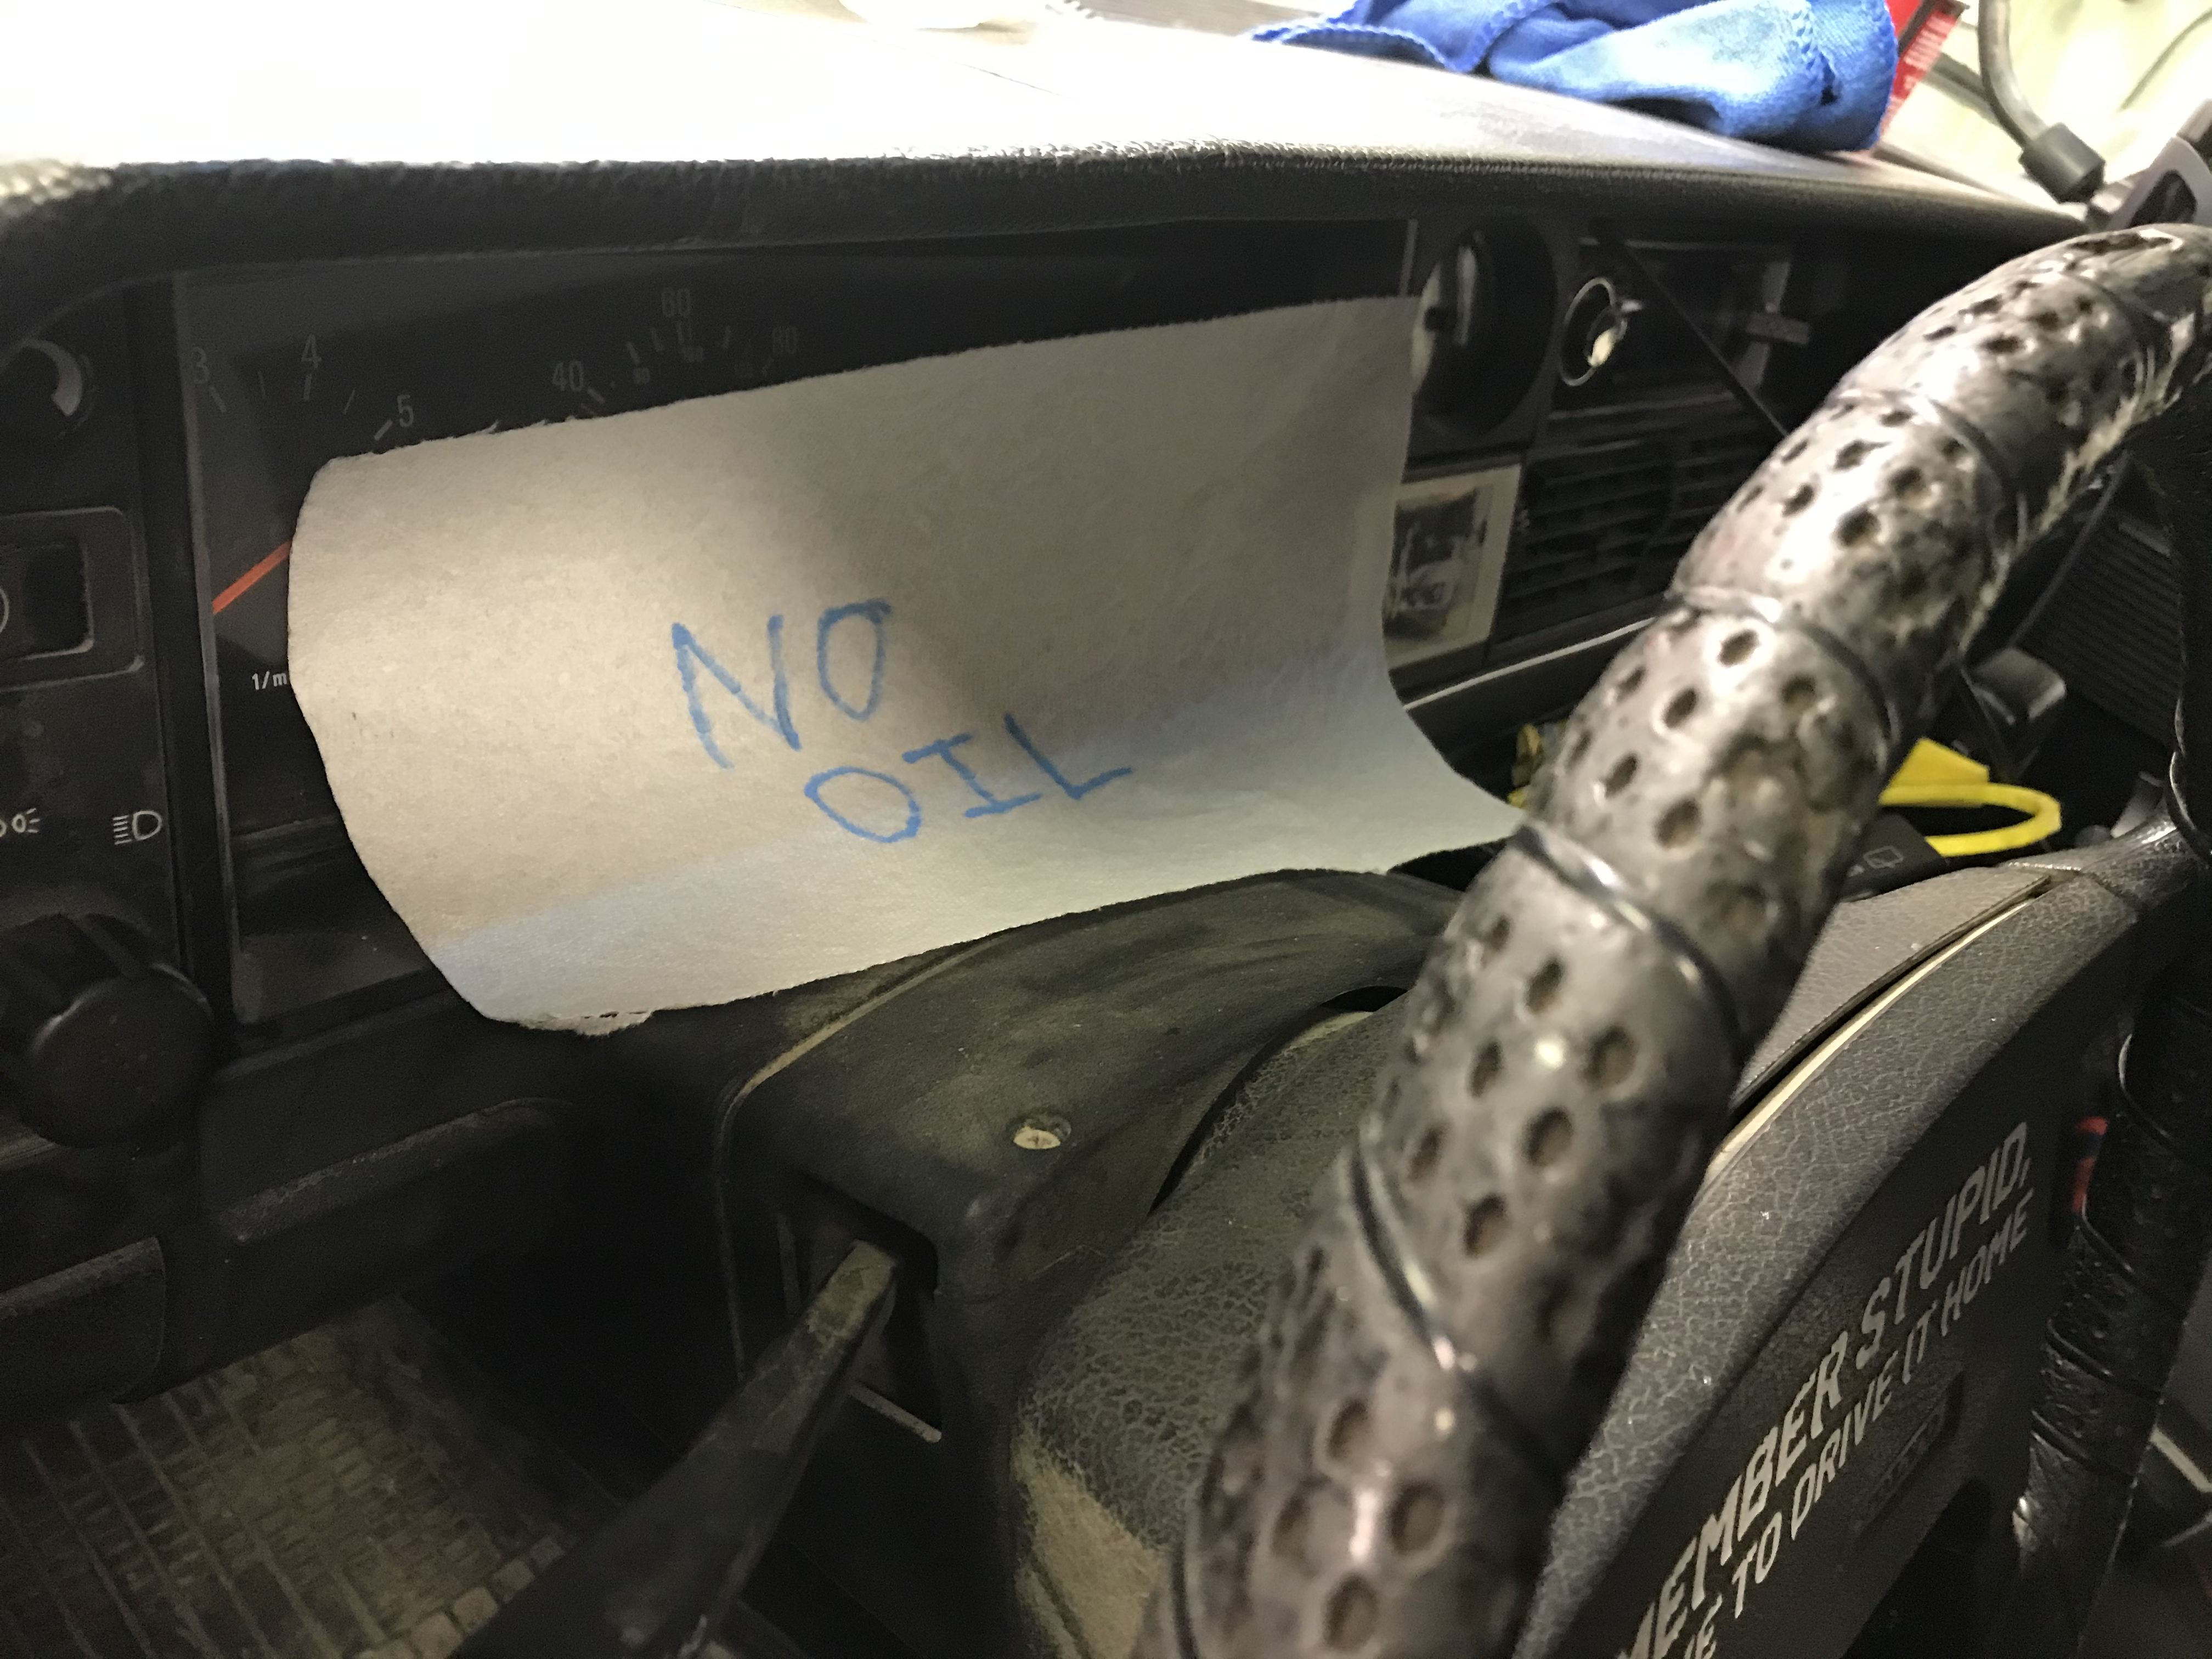
Remember not to start the car without oil
Mechanical Bits
Oil Drain
For the oil drain, I bought a kit on eBay called MAMBA Turbo Oil Feed & Return Drain Line Kit For VOLVO 740 940 TD04H-13C 49189 for $75. It came via incredibly fast DHL shipping from Taiwan (2 days) — I've had parts take longer to come from California. As it turns out, this kit was a poor choice for my application. I wasn't able to use the drain line at all because it was intended for a stock turbo block with the drain press fit using an o-ring seal (I gave the drain line away). My 1984 B23F block didn't have the oil drain hole or the casting to drill a hole. Even if it did have the casting, I wasn't interested in drilling the block — attempting to clean the chips out of the crankcase seemed like a recipe for disaster. The parts that I was able to use from the kit were the 10-AN flange for the turbo oil drain, and the banjo bolt and 4-AN oil feed line (described in the next section).
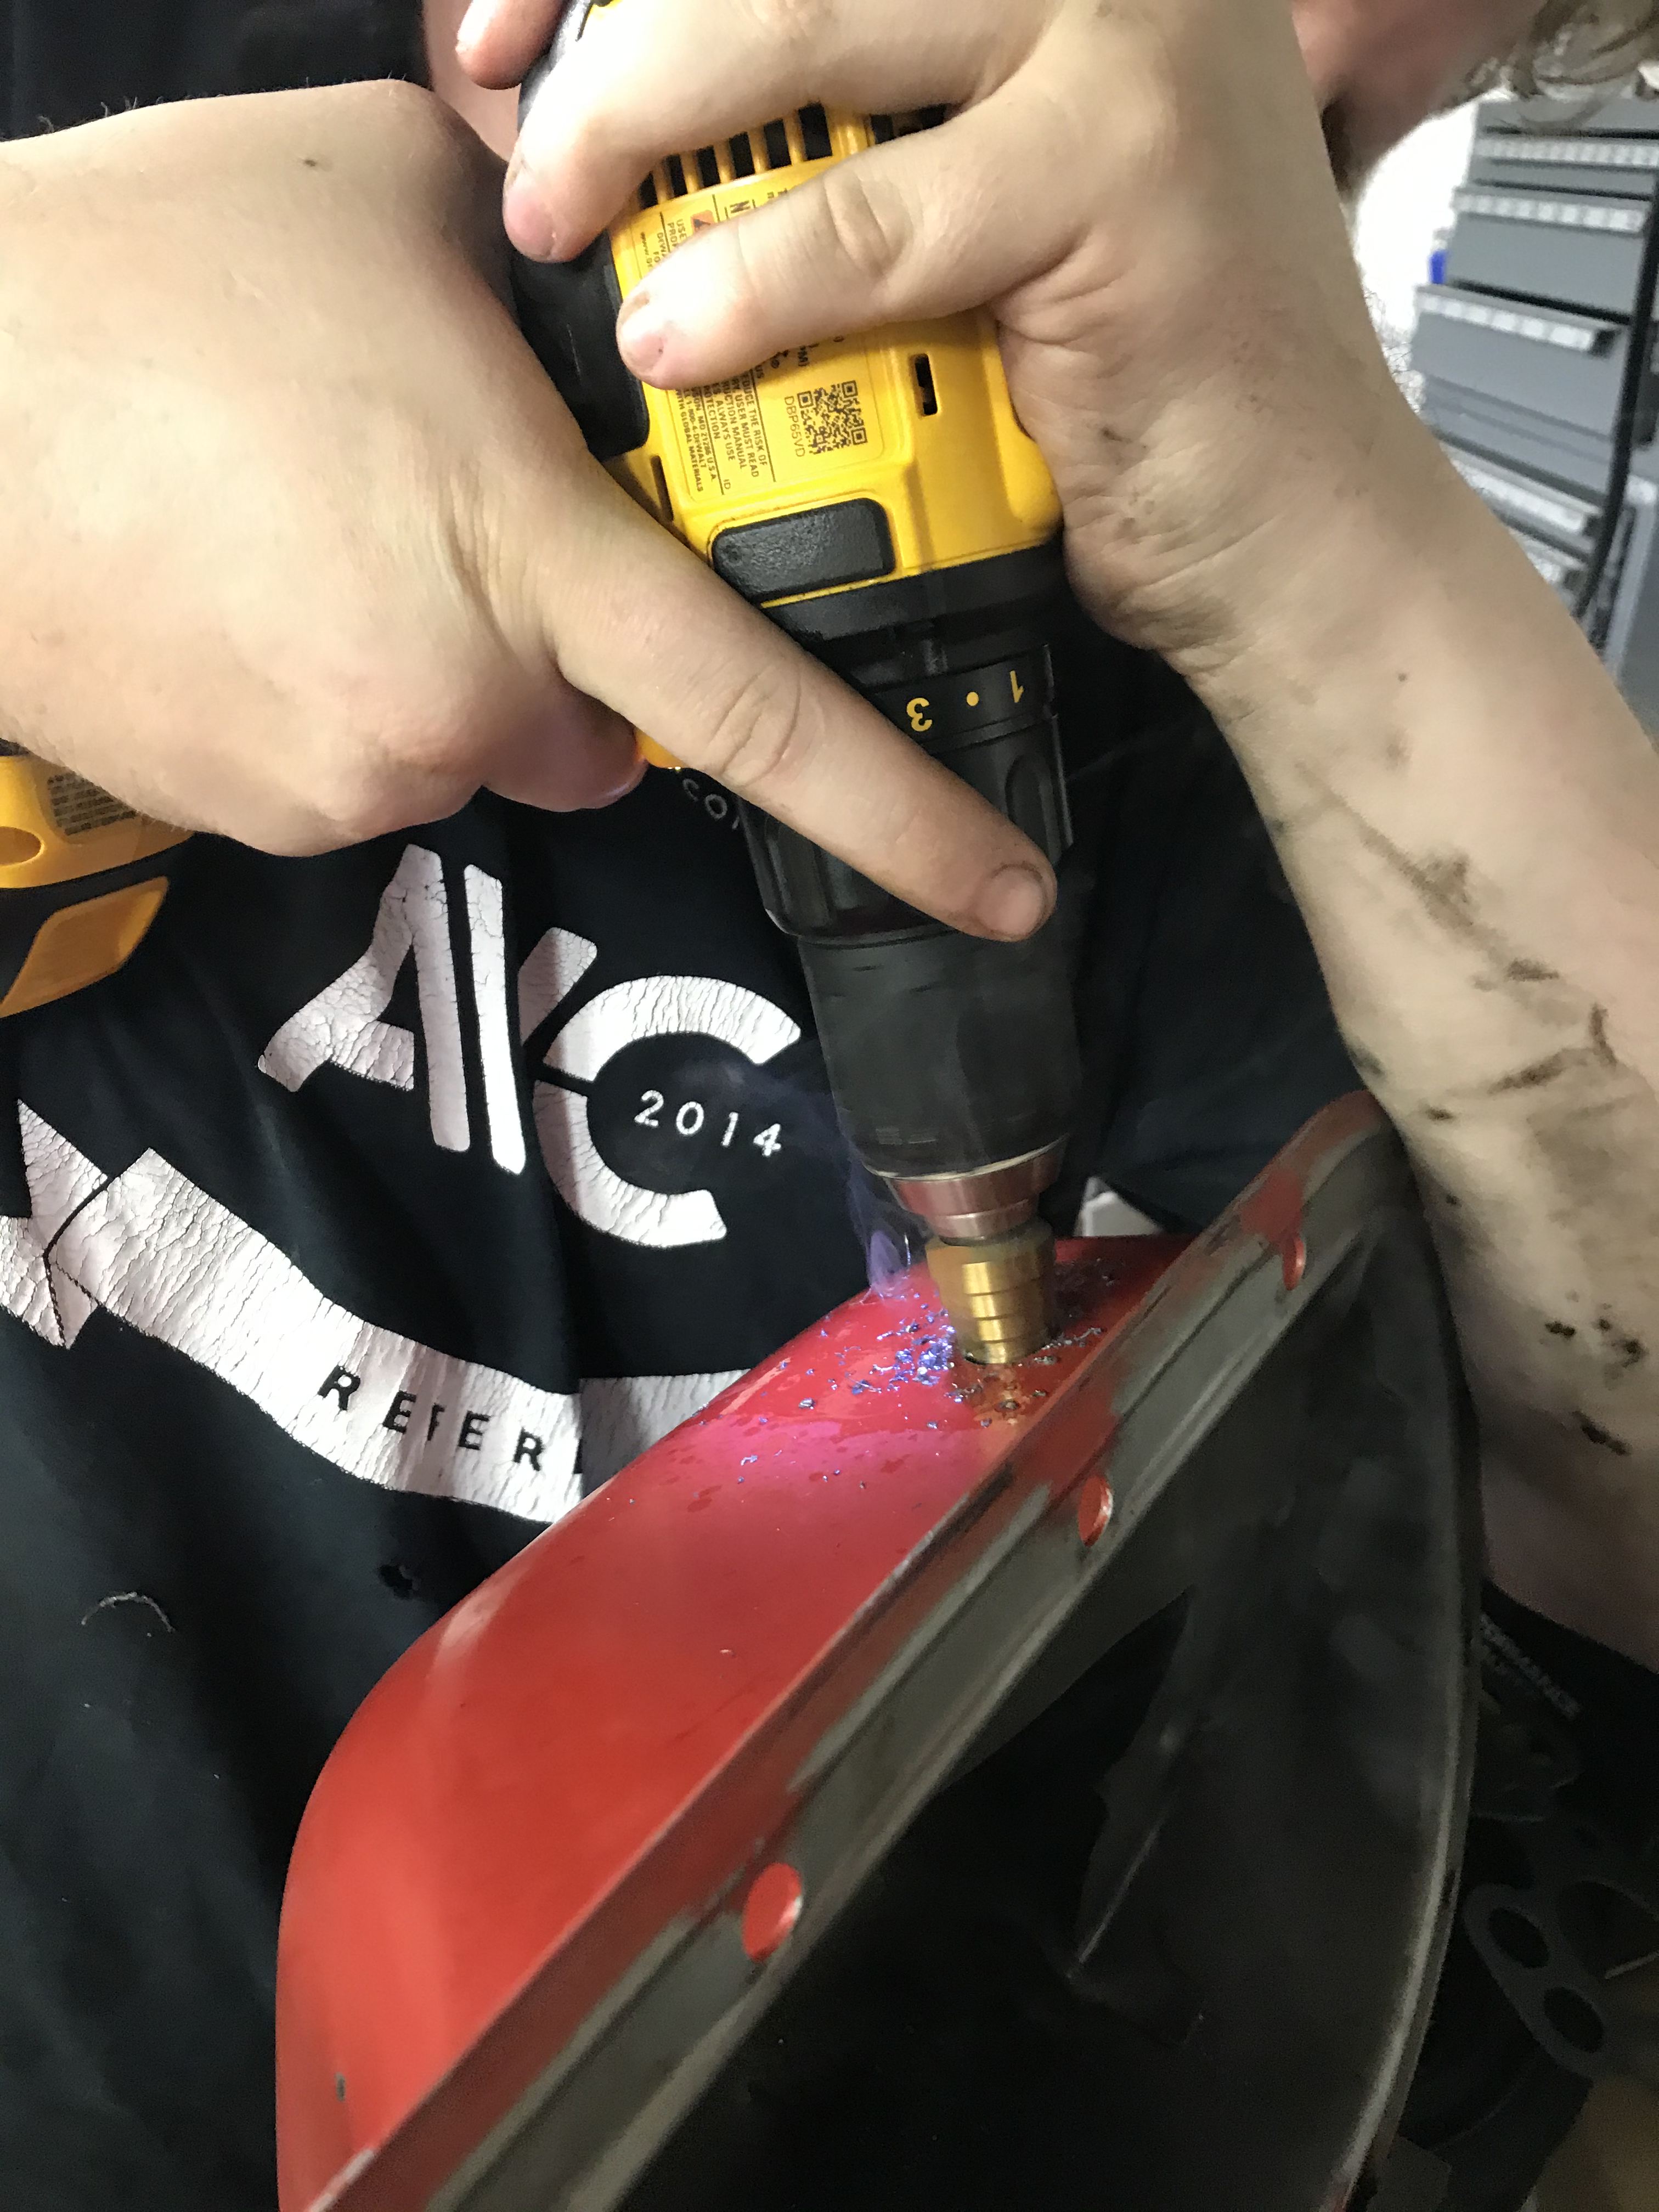
I got a 10-AN bulkhead fitting from Amazon and used a step drill to make a hole in the oil pan below the baffles. As it turned out, I chose a bad place to make the hole.
Drilling the oil pan with a step drill
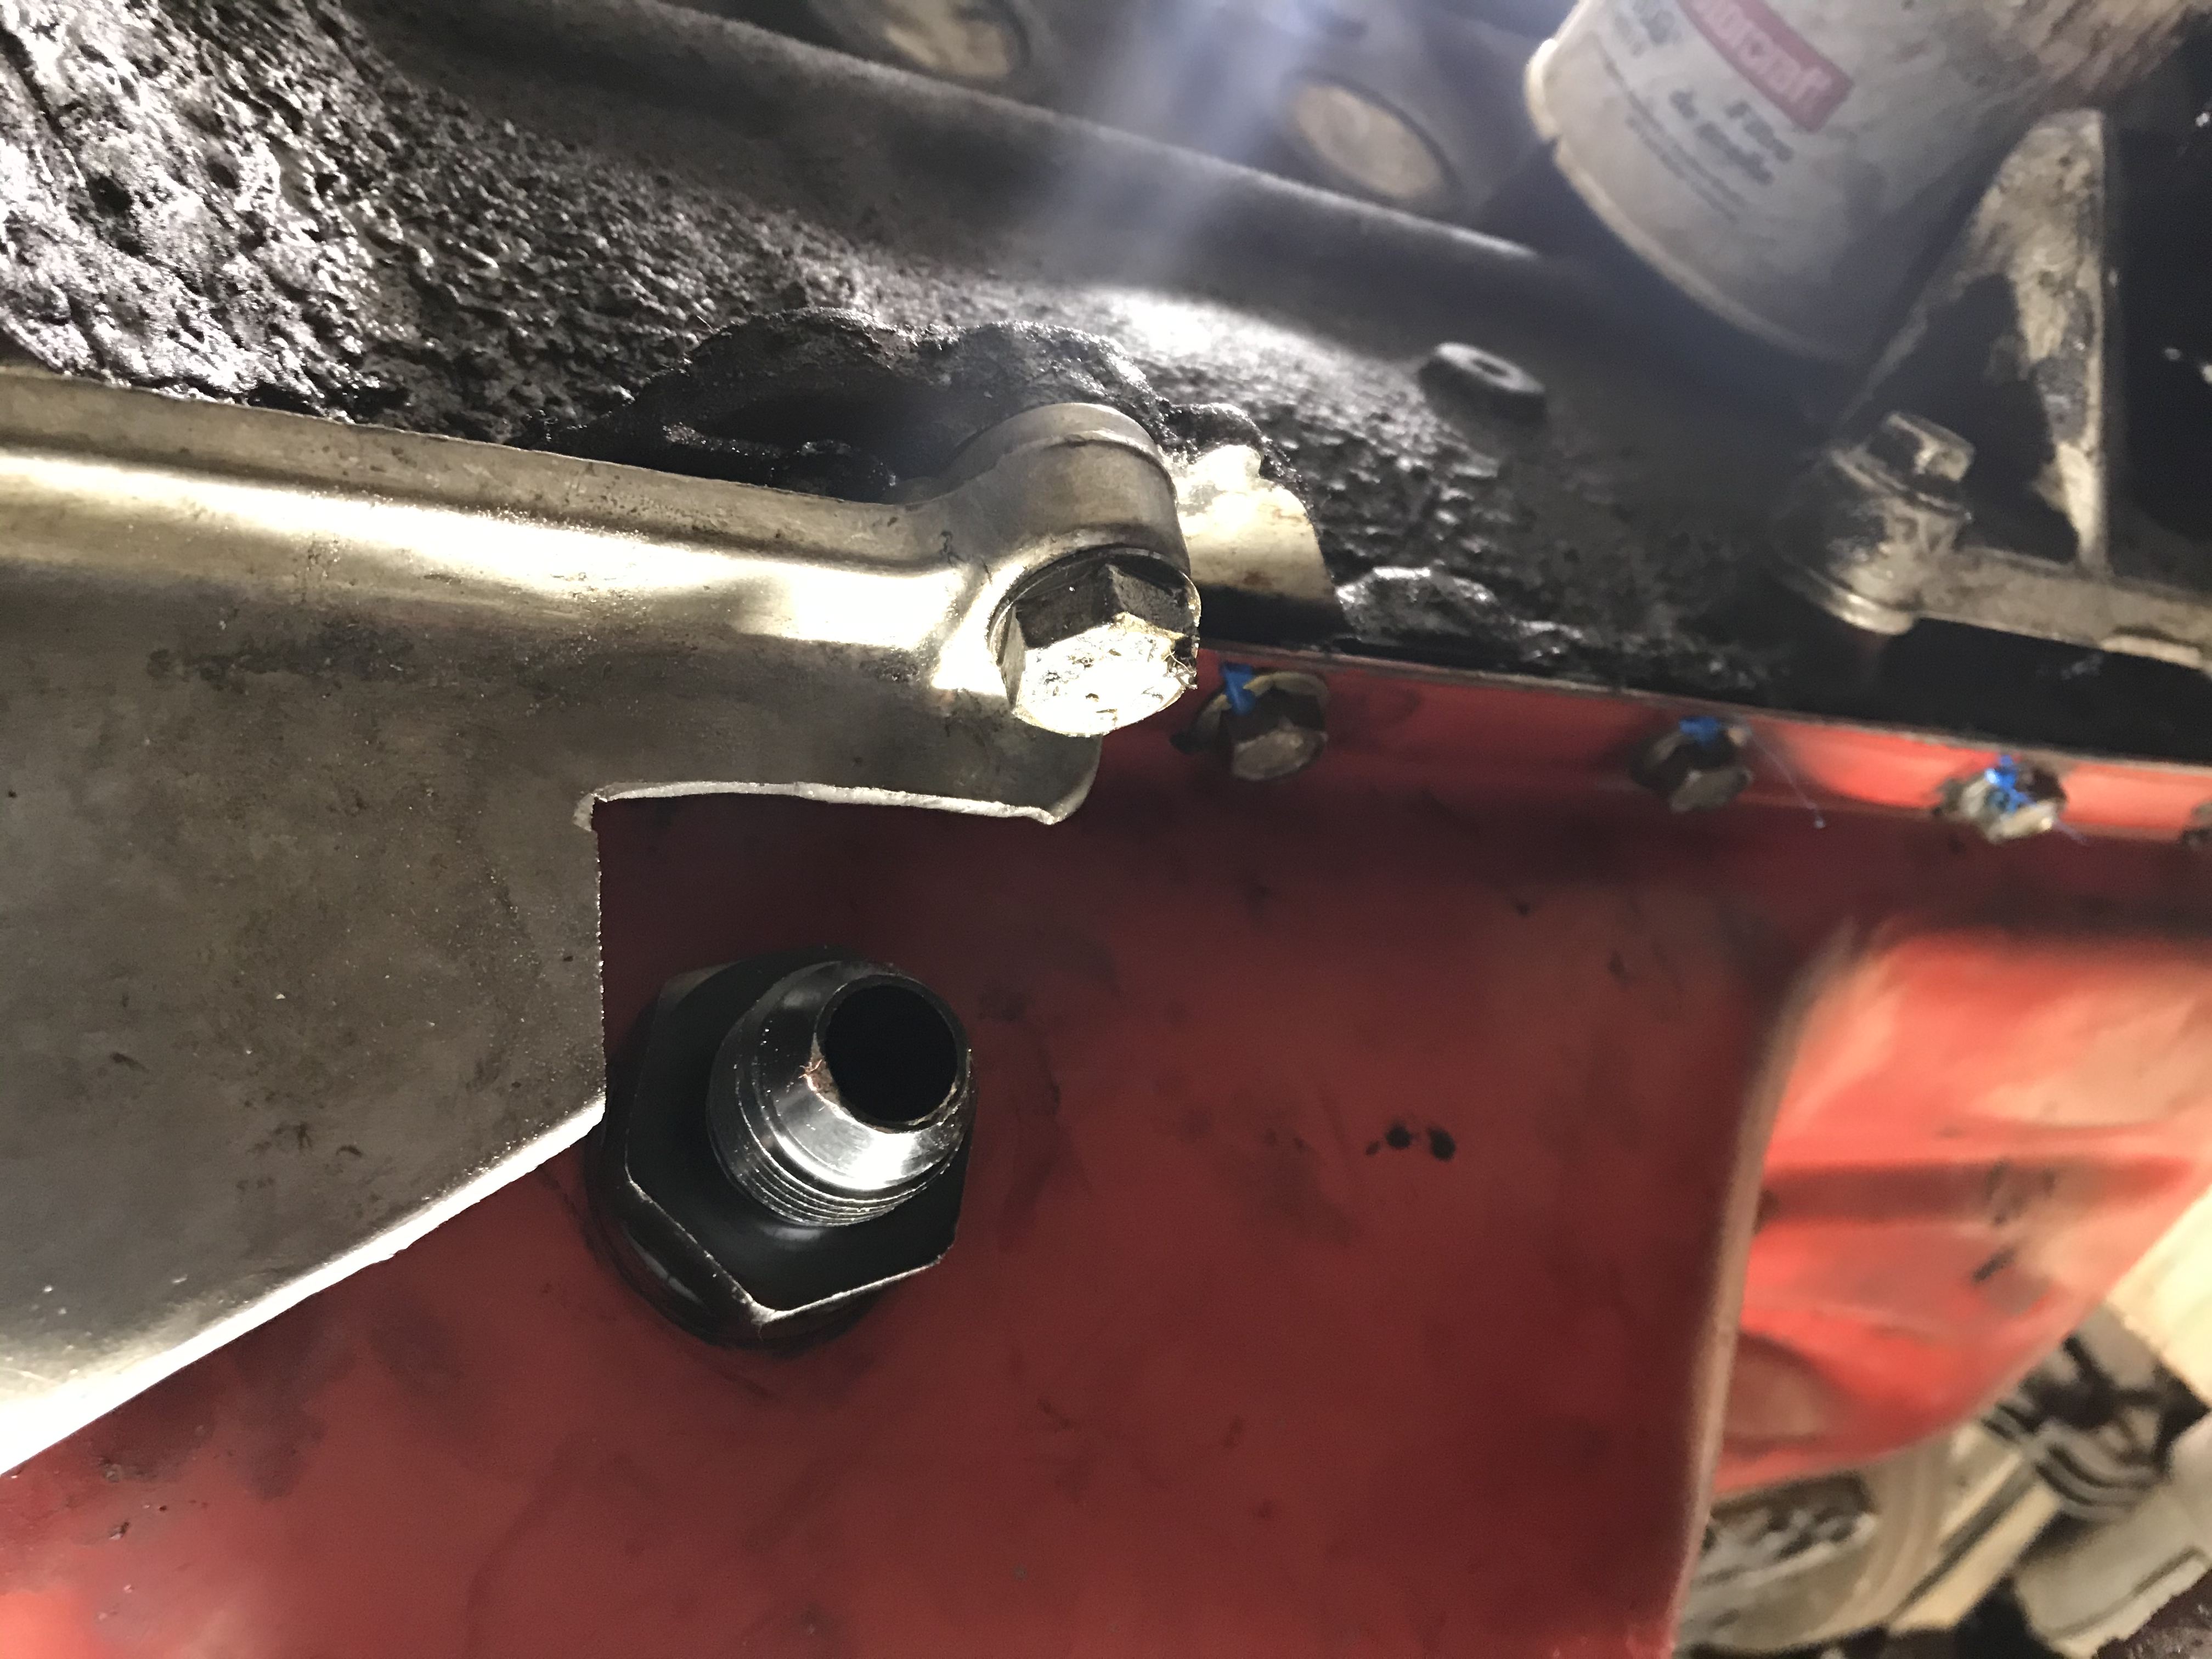
Bulkhead fitting installed with a right angle fitting
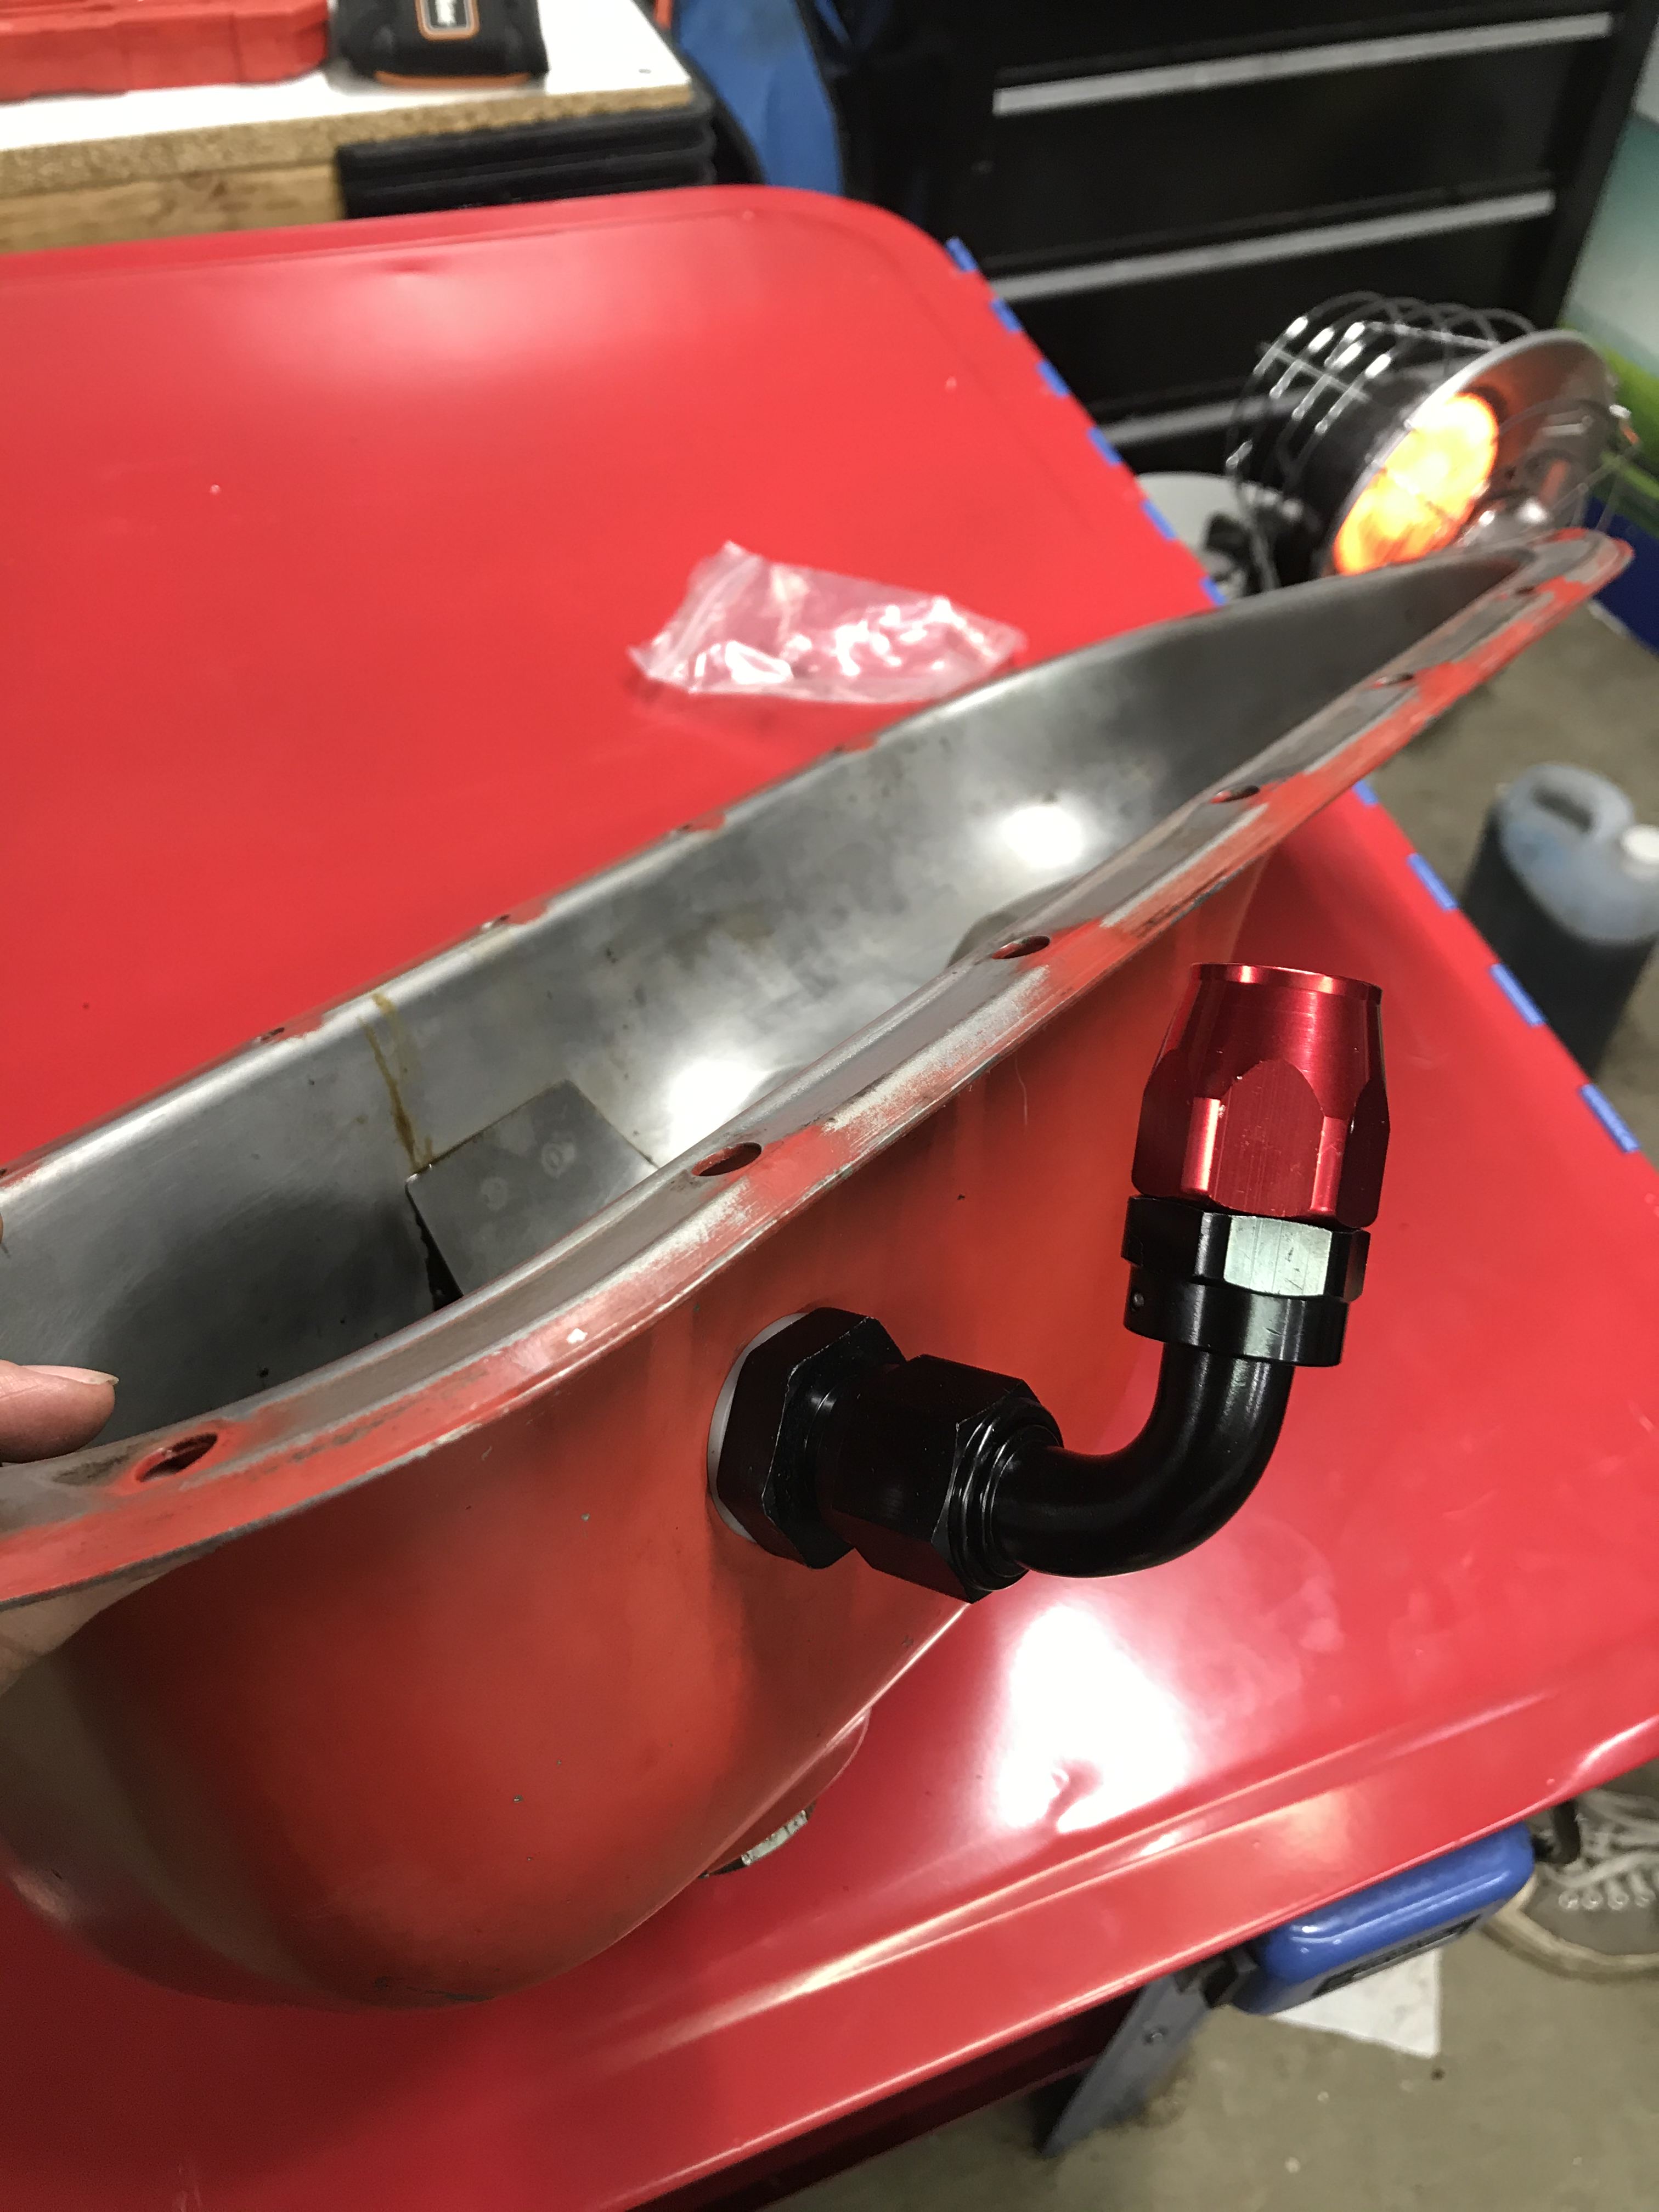
Don't put the fitting here
The fitting interfered with the cover that installs between the engine and the transmission. I'm not sure if this is M46-only, and it looks like we might have been able to leave the cover off, but I chose to cut a notch to avoid the fitting. If you're smarter than me, you'll drill the hole a few inches forward so that it doesn't interfere with the transmission cover.
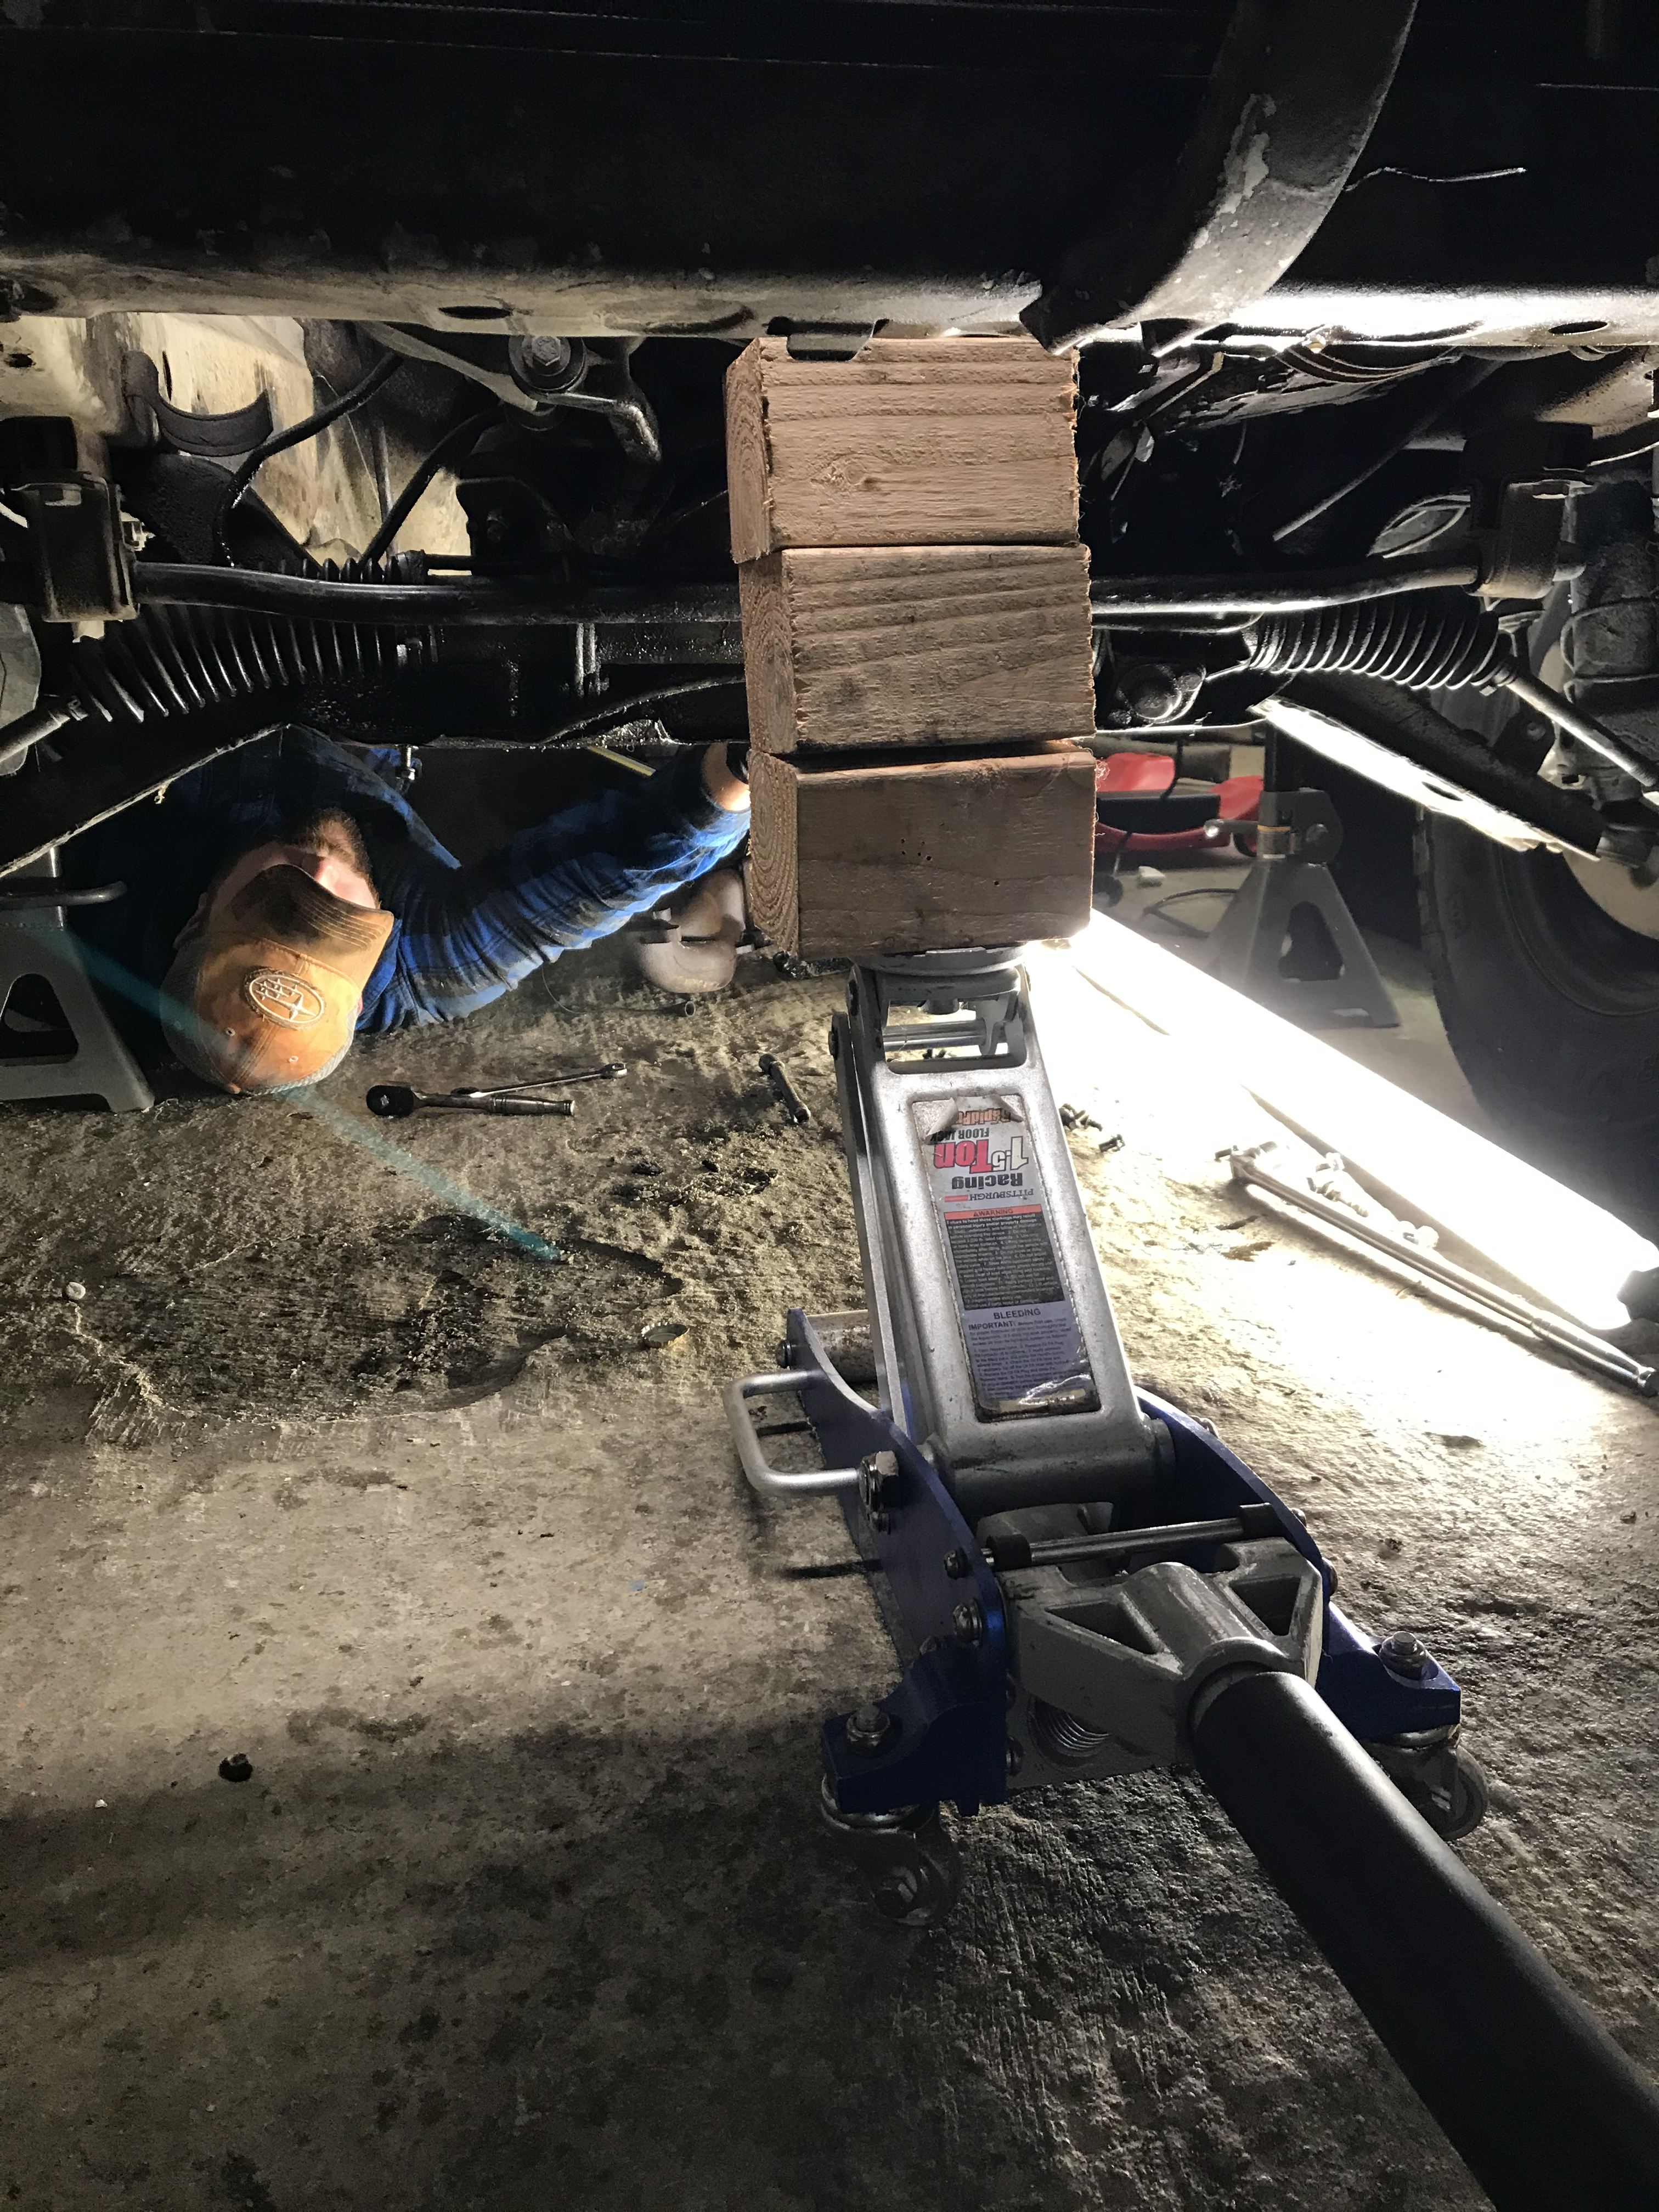
Removing the oil pan was a real pain. We ended up disconnecting the subframe via the two bolts on either side (using long extensions for the ones under the brake master cylinder) and then jacking the engine up on the crank pulley and putting blocks between the cross-member and the frame. It was a little sketchy, but we got the pan out eventually. We broke off about two inches of the rubber hose next to the oil pickup, I didn't bother replacing it at the time, but I've since replaced it when I fixed the leaky bulkhead fitting.
It would be wise to pick up this drain hose when you're working with the oil pan off. Mine was very crusty after 30 years and would've been next to impossible to remove without access from the bottom.
Hi Doug!
Bulkhead fitting installed with a right angle fitting
Oil Feed
For the oil feed, on the turbo side, I used the banjo bolt and hose from the eBay MAMBA kit. On the block side, I used a -4AN to 1/8 NPT fitting to first adapt the feed line and then a 1/8 NPT brass tee to keep the stock oil pressure sensor. Clocking this tee fitting carefully was needed to clear the oil filter sandwich plate and the alternator. I had to screw the tee into the block and then the oil pressure sender into the tee — when I first installed it, the assembly spewed a puddle of oil under the car because I didn't tighten it or install the pipe tape properly. All the NPT fittings need pipe tape, but the AN fittings seal with the flare and don't need tape. B23 blocks like mine have a 1/8 NPT oil pressure sensor feed, but B230 and other blocks might have different fitting sizes.
Oil Cooler
Don't set up the oil cooler the same way I did. The stock 740 turbo setup has an oil filter adapter that moves the oil filter towards the back of the car and hard lines that run forwards towards the oil cooler and then midway become crimped-on rubber hoses into right angle fittings in the oil cooler. At the junkyard, I cut the rubber hoses above the fittings on the oil cooler side from the donor car. Instead, either remove the oil filter adapter, hard lines/flex hose assemblies, and oil cooler from the donor car as an entire system or use an aftermarket sandwich plate plus an aftermarket oil cooler.
I didn't do either of these. I used
- : I used an aftermarket sandwich plate ($15 on eBay, they come in several colors)
- "Evil Energy" brand nylon 10-AN hose and fittings, from Amazon. I was dumb and bought a 10ft kit and then a 16ft kit, because I ran out of fittings. Note: these were all 10AN kits with black and red fittings when I bought them, but it looks like some of them have changed to black/black fittings, and not all of them have 10AN in stock. Don't follow the links blindly since Amazon 3rd party sellers and Amazon itself changes inventory all the time; make sure you're getting the right hose.
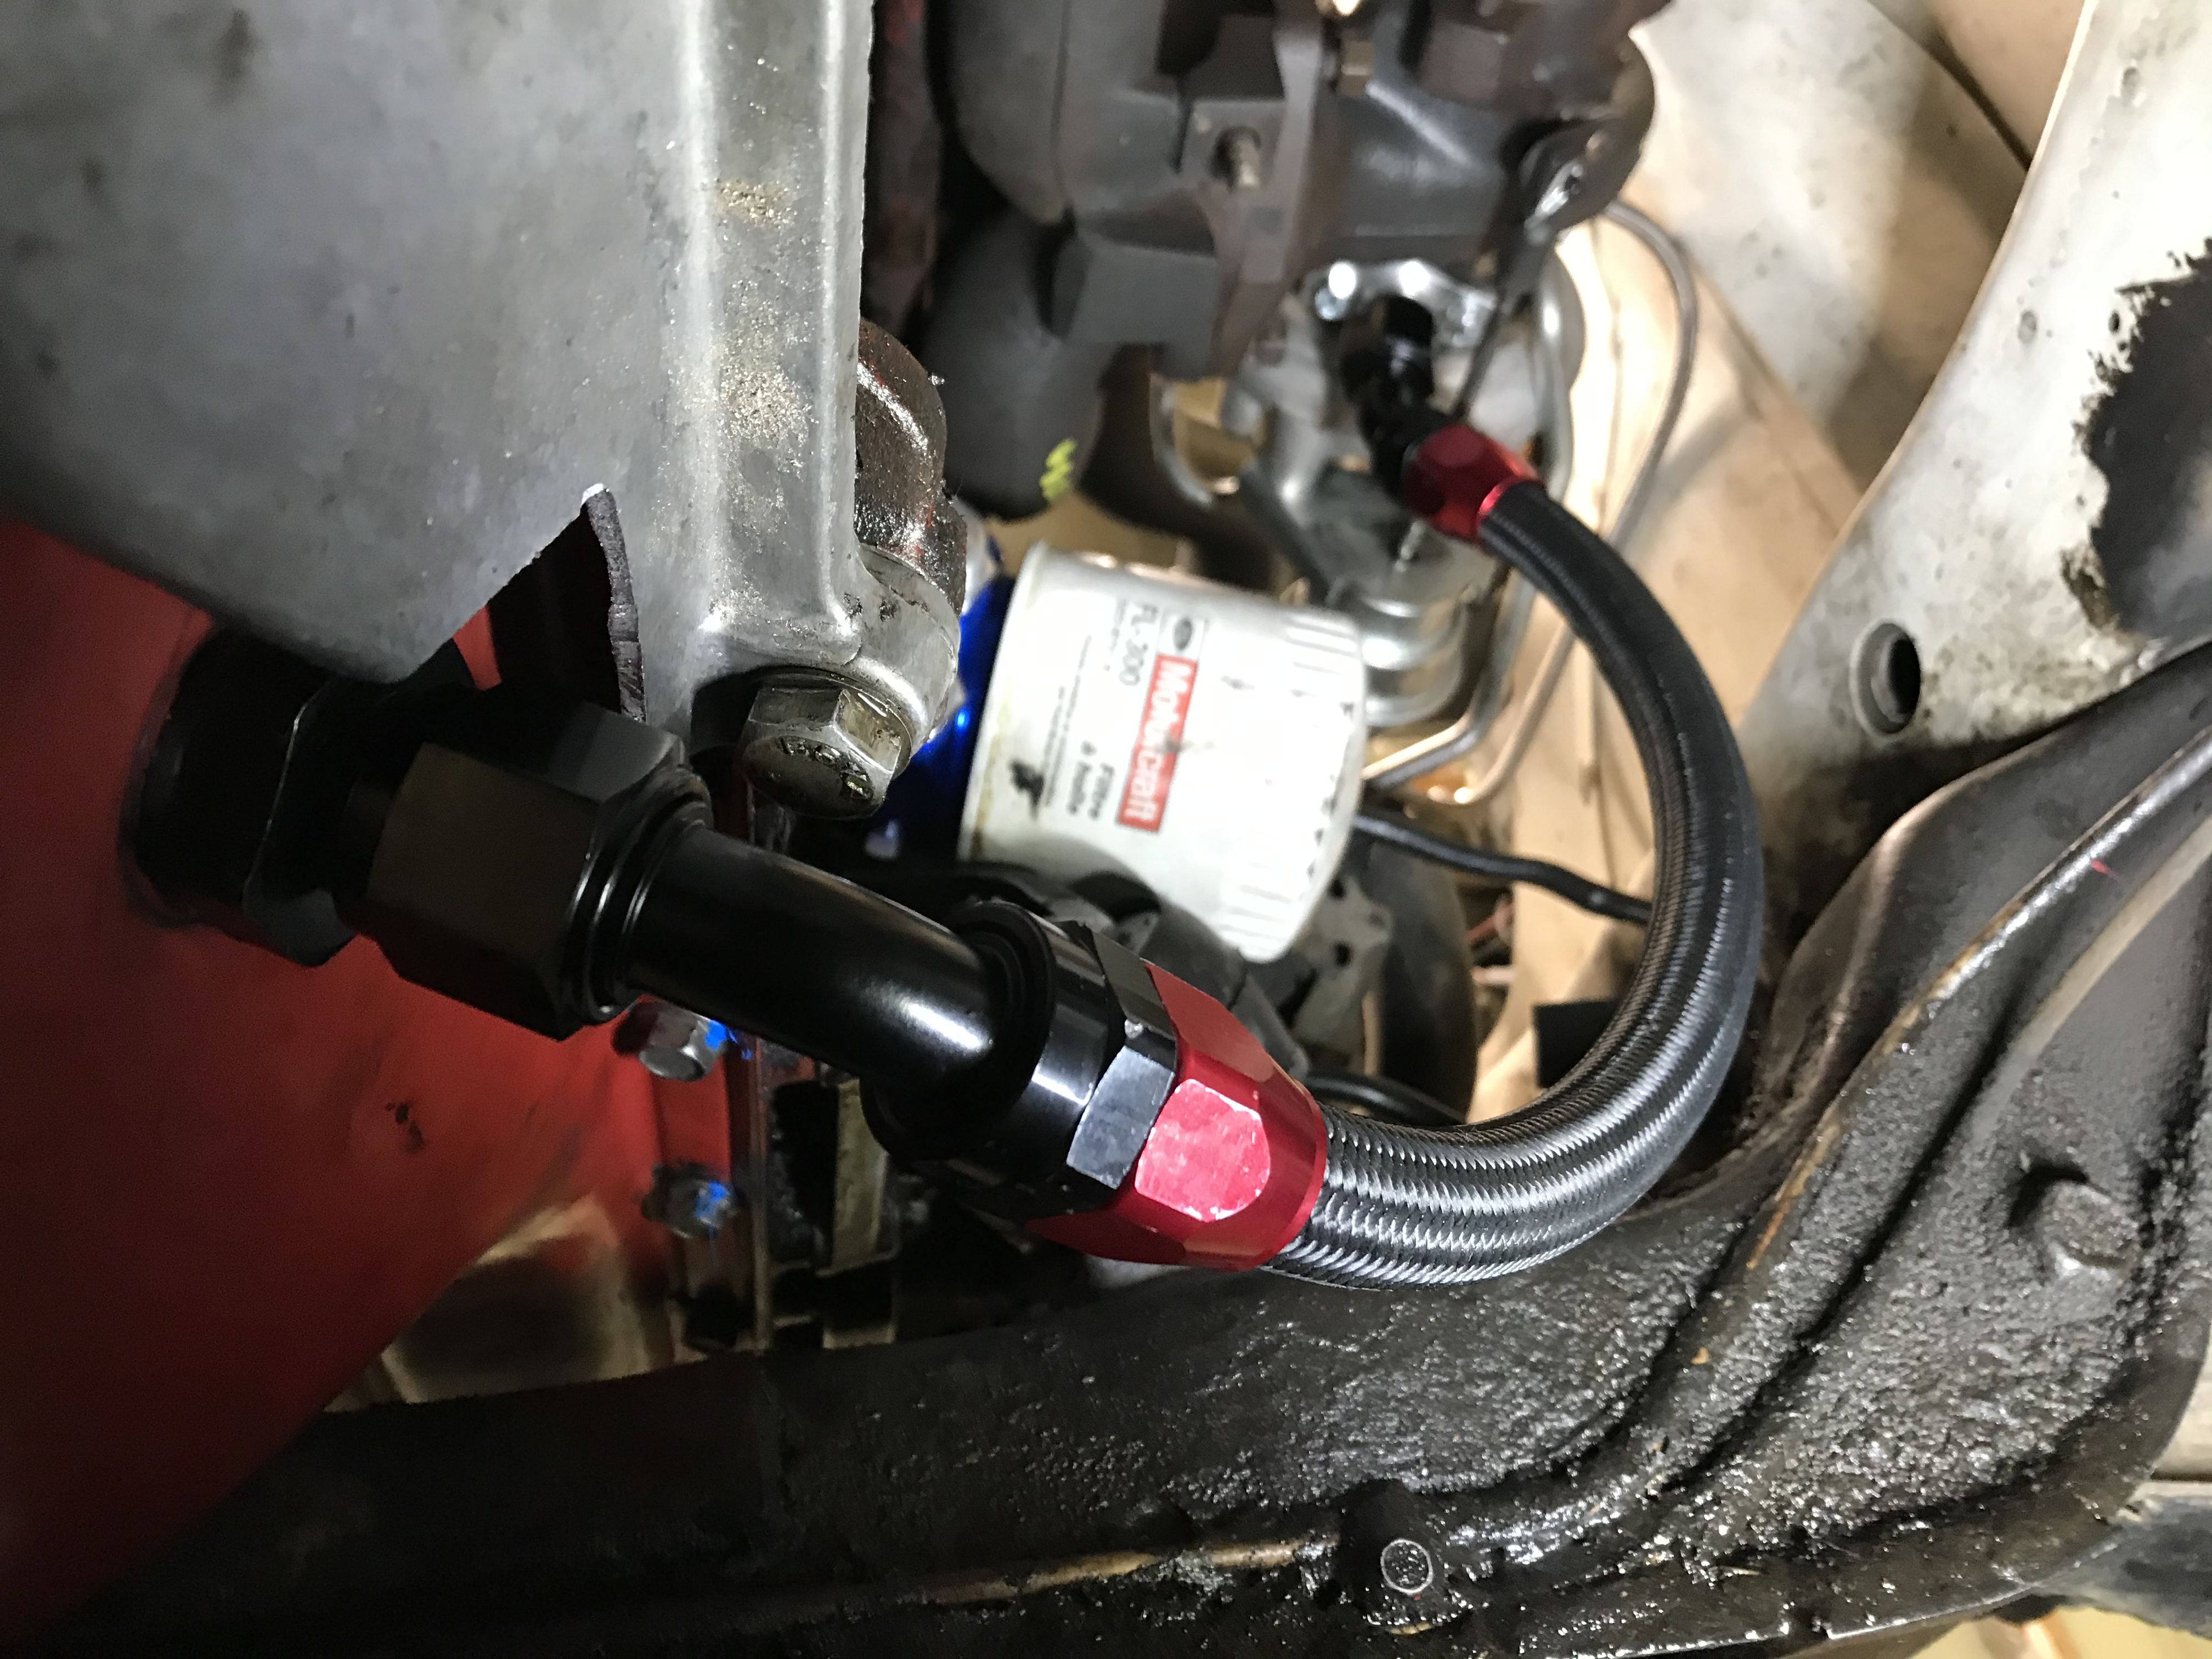
- and the stock oil cooler. The stock oil cooler uses arcane fittings called 1/2" BSP. I was unable to find 1/2" BSP to -10AN adapters, so I had to stack two adapters, first 1/2" BSP to 1/2" NPT and then 1/2" NPT to -10AN.
- Charcoal Canister (two hoses)
- Vacuum/Boost Gauge
- Vacuum advance distributor
- Cabin HVAC Vacuum Line
- Turbo CBV/Blow-off Valve
- Fuel Pressure Regulator
- Brake Booster
- Not getting the entire factory oil cooler setup from the donor car
- Not getting the radiator/intercooler bottom rubber mounts from the donor car
- Not getting the coolant reservoir from the donor car
- Cutting instead of unplugging the O2 sensor from the donor car
- Assuming the car's existing harness was compatible with LH2.2 (really, the mistake here is that I didn't know there was a difference between LH2.0 and LH2.2)
- Not using pipe tape on NPT fittings
- Not checking the fuel injector grounds to the manifold
- Not checking the fuel line for kinks
- Not having the vacuum connections hooked up (or hooked up correctly)
- Not capping the intake hose IAC port
- Putting the ignition system in the wrong place, and not giving the fuel computer the tach (coil negative) input
- Pointing the exhaust at the gas tank (accidentally)
I really wouldn't recommend doing this
Also this picture is wrong because the NPT to NPT connection in the middle needs pipe tape.
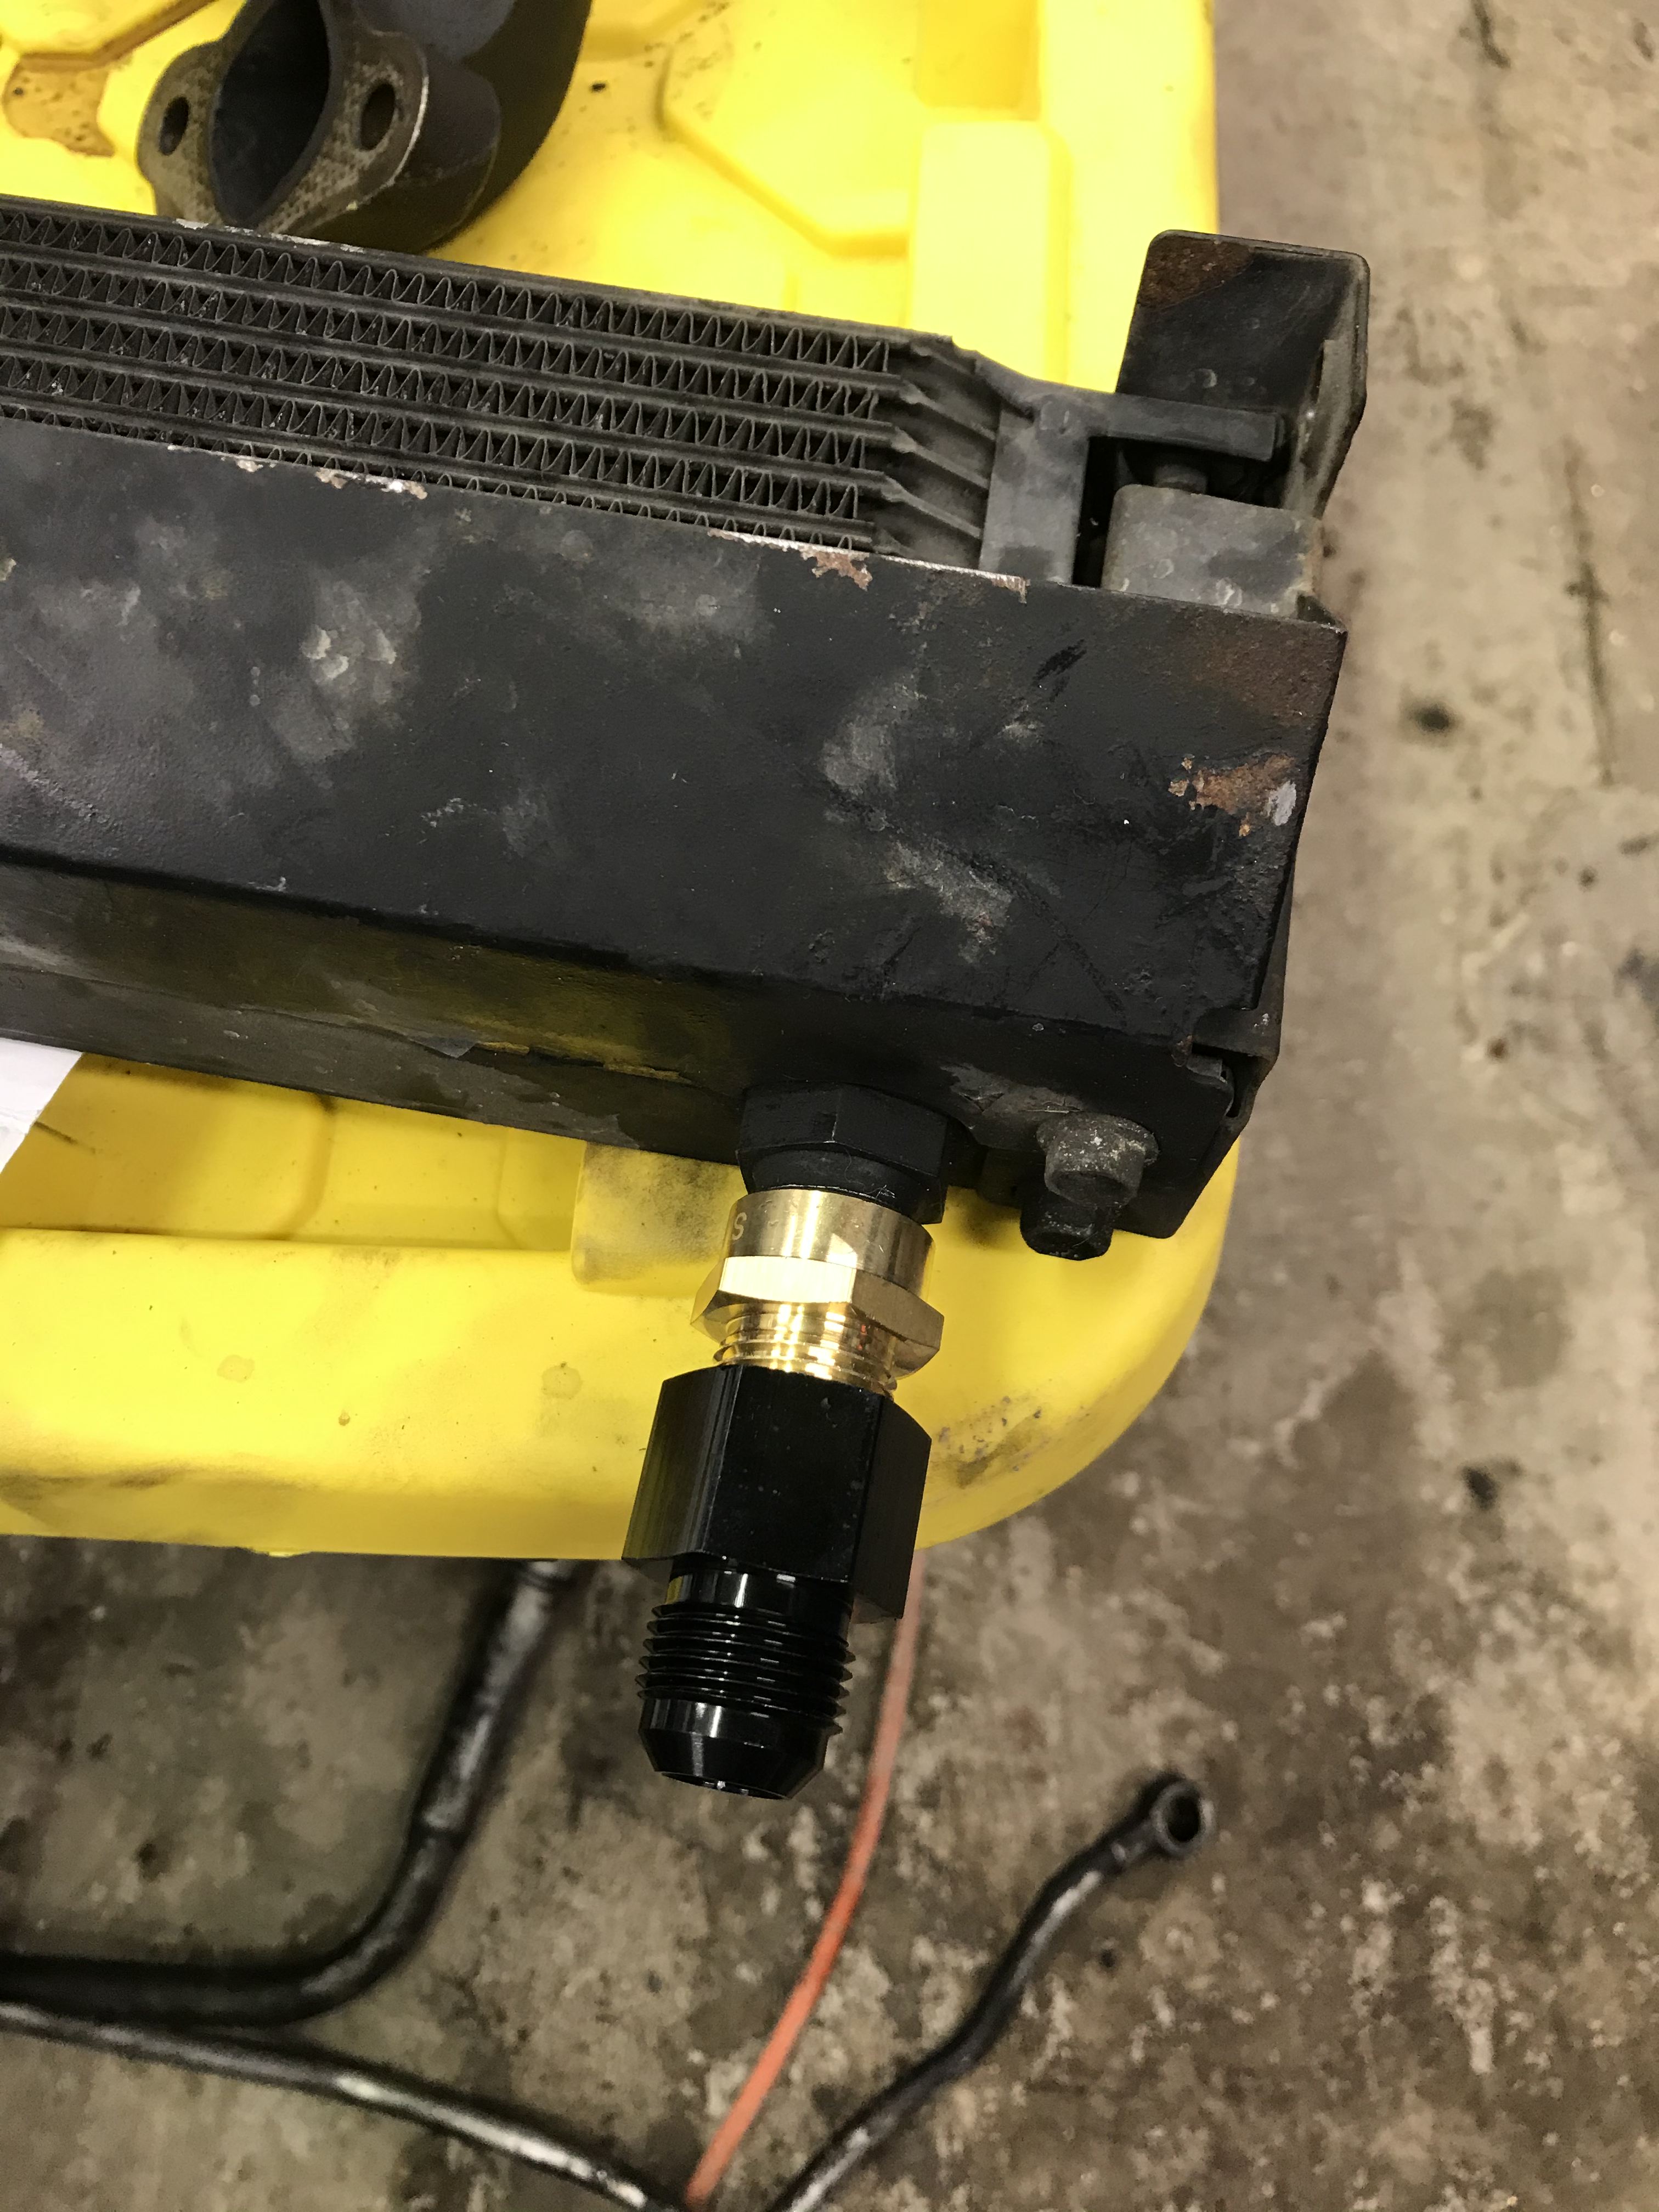
This whole stack is really dumb, and I wouldn't recommend doing this at all. The stack of fittings alone cost $35 total, which is almost enough to get an aftermarket 10AN Oil Cooler. There are kits that have the hoses, fittings, sandwich plate, and oil cooler all together.
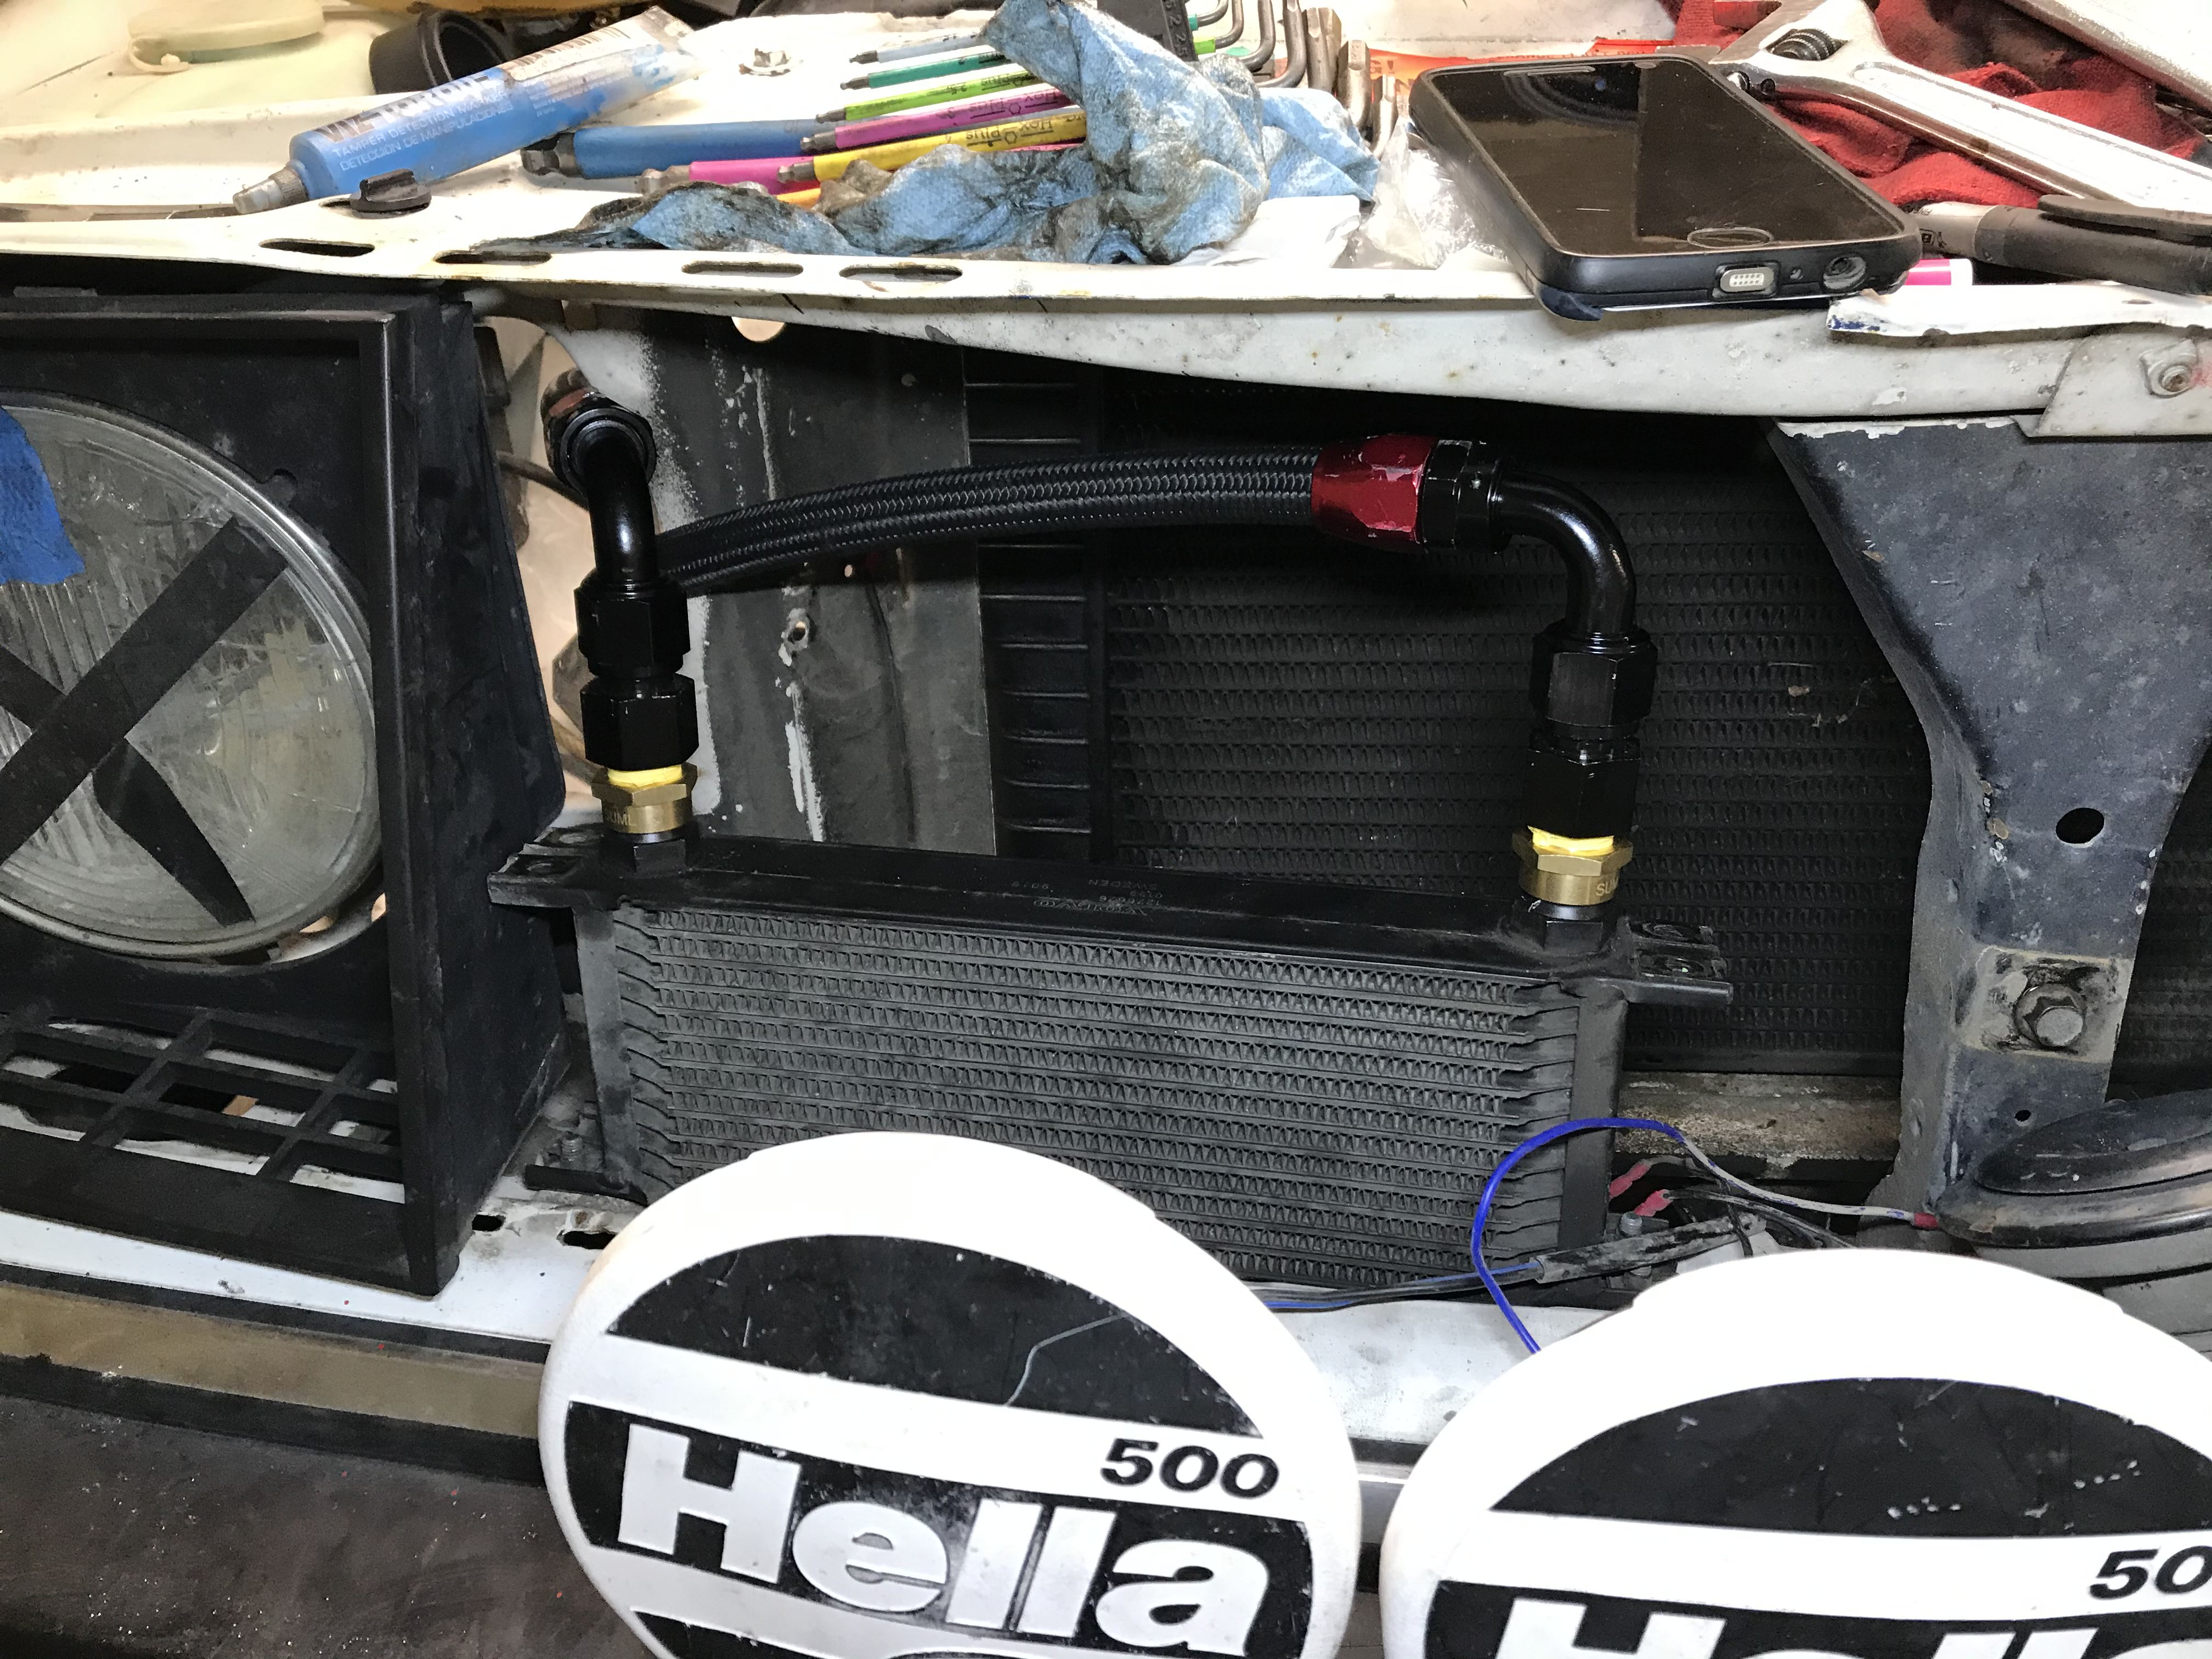
To mount the oil cooler, I took off all the stock mounting brackets and just bolted it a few inches behind the grill. I can't comment on cooling performance because I haven't had the car in any temperature stressing situations and I haven't installed an oil temperature gauge. I'll install an eBay one soon using the two ports in the aftermarket oil filter sandwich plate. These ports were not on the stock filter adapter, so I suppose that's one advantage of using an aftermarket sandwich plate instead of the stock filter relocation adapter. One other potential advantage is being able to use the ports on the sandwich plate for the feed line into the turbo, but I found the routing was easier from the oil pressure sensor port.
Guess it just drills in there
Coolant Feed
The coolant for the turbo feeds in from the lower radiator hose to the bottom of the turbo and out the top of the turbo to the hose that goes to the bottom of the coolant overflow tank. This is to promote the thermal siphon effect—you can read more at Garrett's website.
Luckily, Volvo 740 hoses work pretty well. The lower hose was about $19 and the upper hose was about $15. I grabbed these hoses from the donor car, but I figured it would be best to use new rubber since these hoses tend to crack eventually.
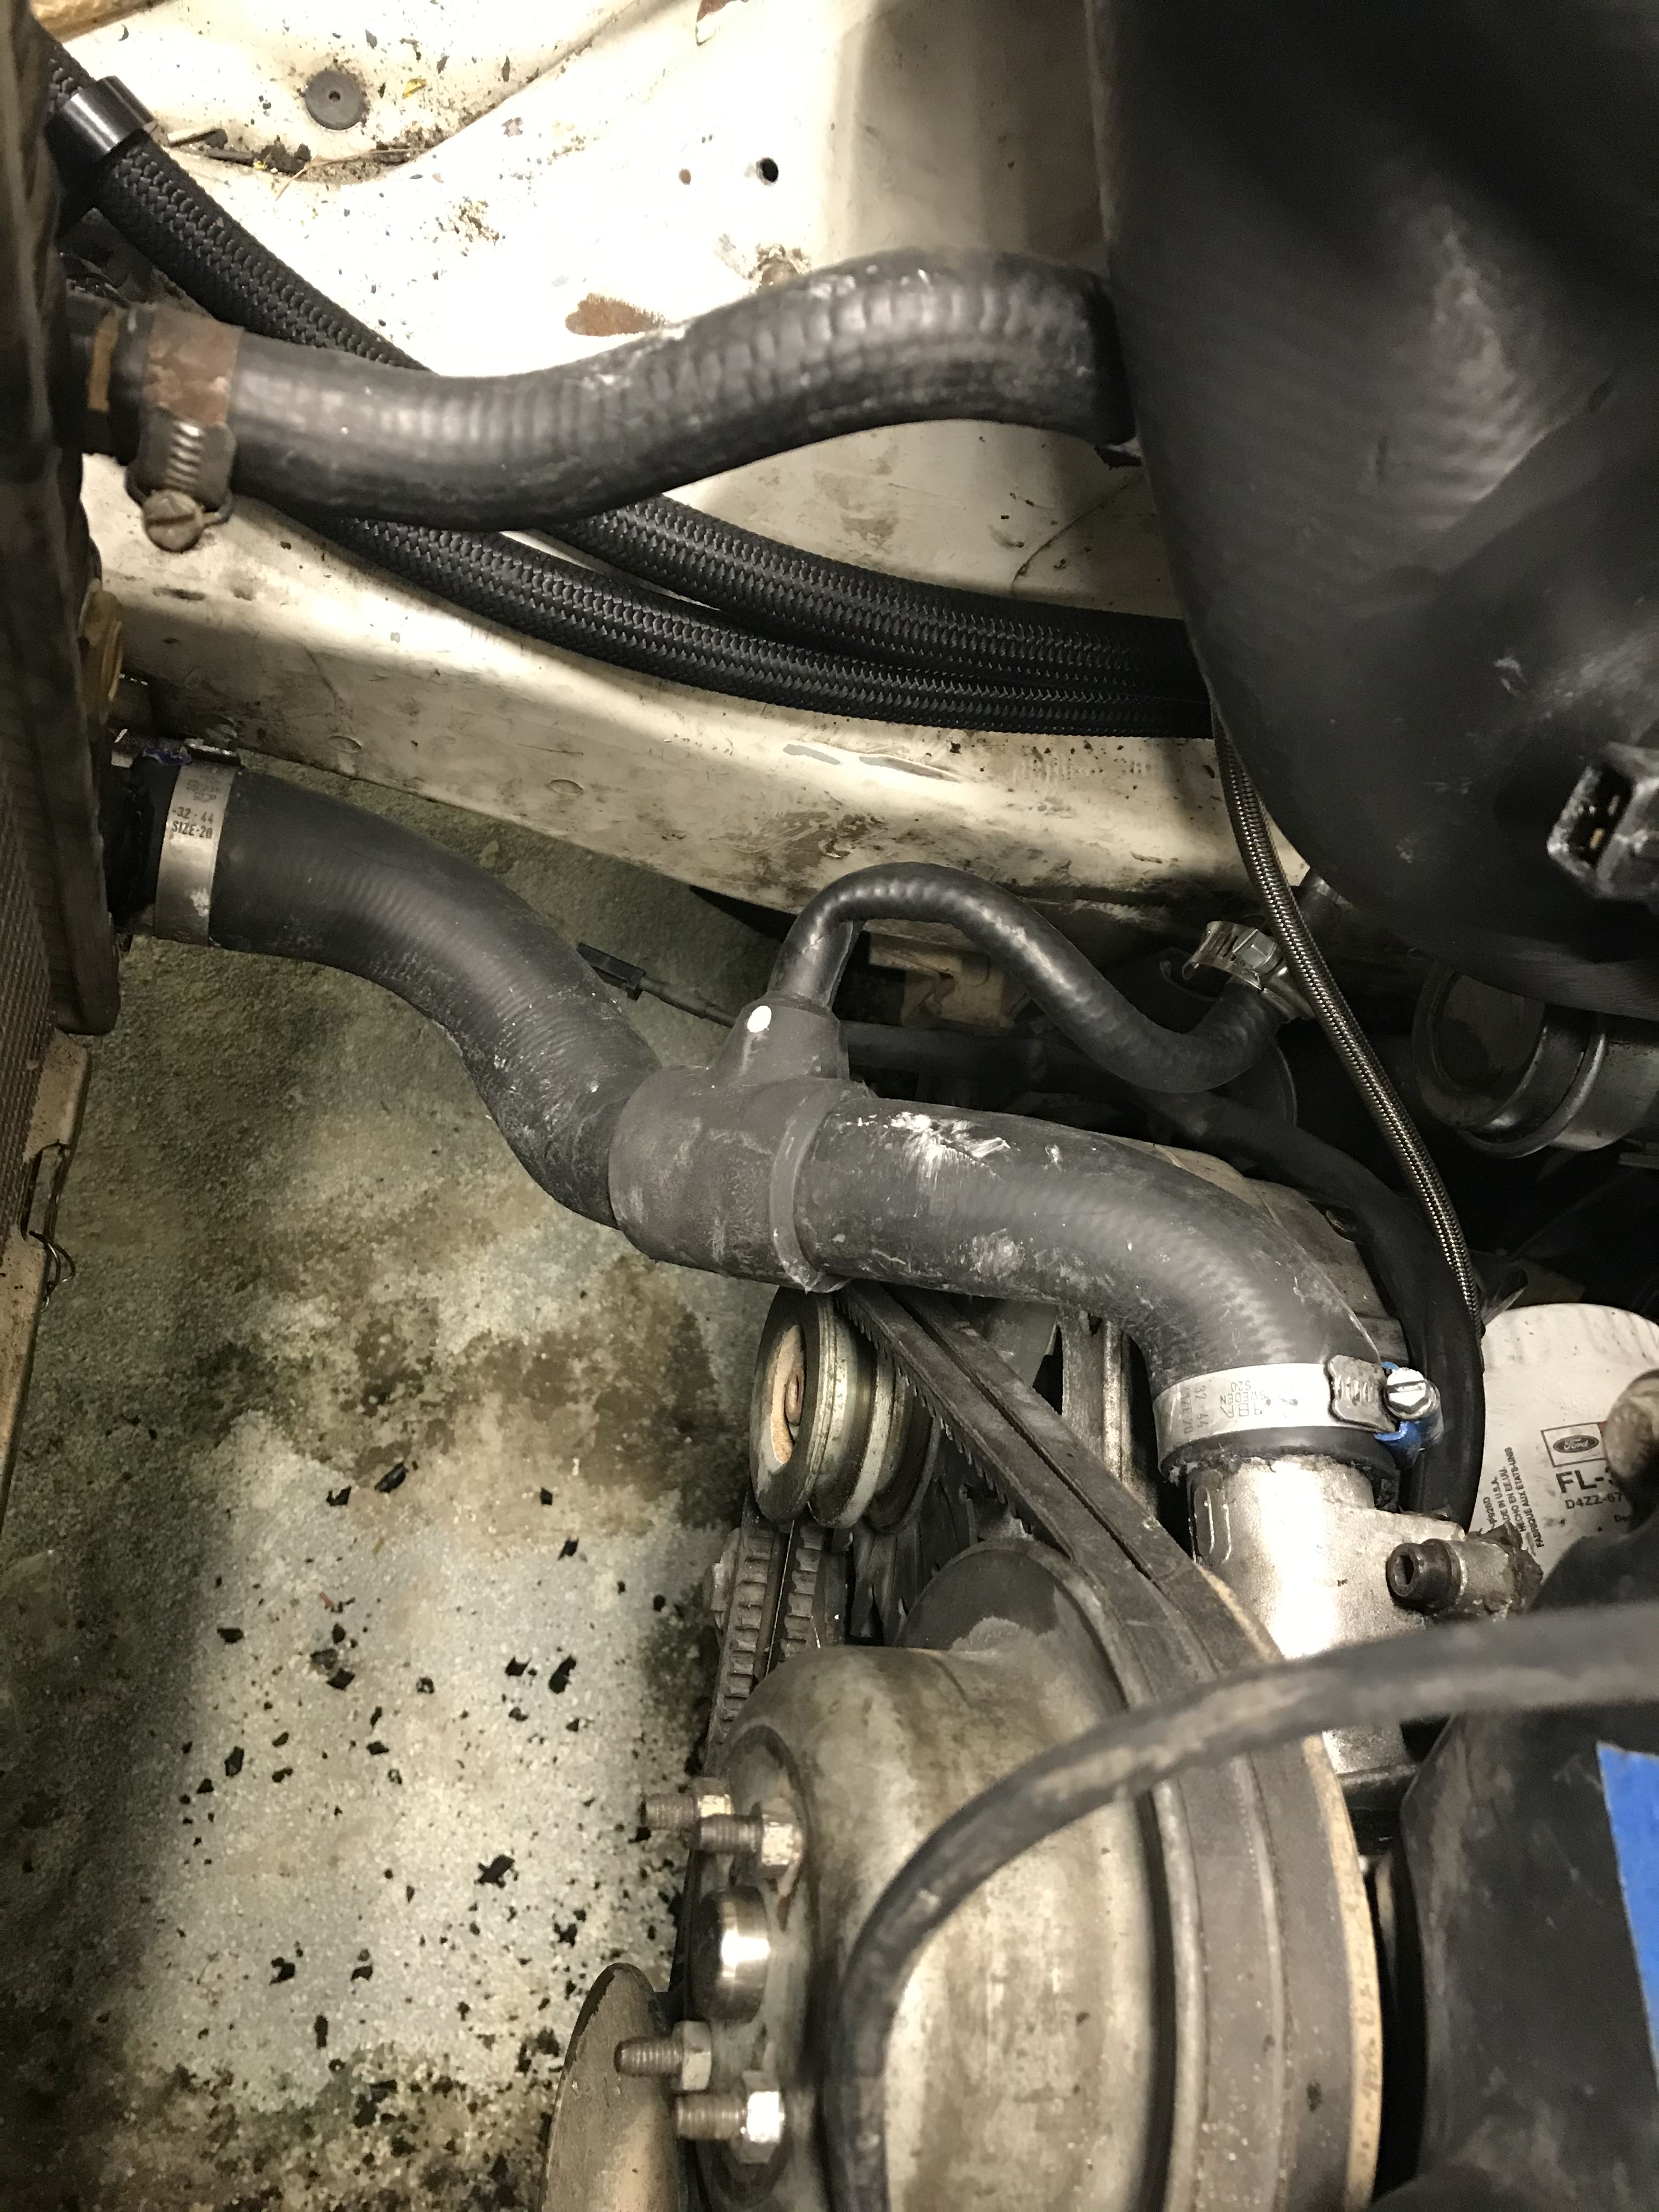
Installing the hoses was a little tricky. I had to cut a few inches off the lower hose as well as the upper hose, and it's not totally obvious which direction the lower hose goes. In the photo, I had installed the hose backwards and consequently the feed to the turbo is kinked. It's not obvious (or at least it wasn't to me), but the feed to the turbo points down before curving around and going to the hardline coming out of the turbo. I had flip the lower radiator hose a few times and cut an inch or two off the end of the feed line as well to get everything to mate up.
The upper feed line was fairly easy to attach, but I switched from the rectangular 240-style coolant overflow reservoir to the round 740-style coolant reservoir. I'd imagine it's possible to keep the original 240 tank, but that would leave less clearance for the MAF sensor and air filter. I removed the windshield wiper fluid tank as well, because it took up a ton of space where the air filter now sits. Eventually, I'll return my attention to the washer fluid and fit a smaller bottle, but it's not at the top of the priority list currently.
This is bad, don't do this
Fuel Rail & Injectors
Turbo cars and all LH2.4 cars use a 3bar (43 PSI) fuel pressure regulator. I believe LH2.2 and LH2.0 N/A cars used a 2.5bar regulator, as well as a different fuel rail for LH2.0. I replaced my original rail with the fuel rail from the donor car. It bolted right on to the manifold and the fitting for the fuel input from the filter fit. The only issue was that I had to fashion a sealing cap for the connection to the cold start injector, as my manifold doesn't have one. I replaced the fuel pressure regulator with a 3.0 bar regulator from eBay. Do not buy the one at this link. Mine failed after less than a month—fuel was pouring out of the vacuum port.
For fuel injectors, I ordered a set of five from eBay, intended for an 850 turbo. These are high impedance injectors so they can be connected directly to the harness. One of the green injectors from the donor car was a bit melted (maybe a bad sign? or maybe that's why the car was in the junkyard in the first place?) so even if I had wanted to use those low impedance green injectors, I would've needed to get a new set in addition to the resistor pack. I kept all the green injectors from the junkyard car, but I should have tossed them back in the car and taken just the rail.
I struggled for several weeks trying to figure out why my car would sometimes not start, why sometimes it would stumble, and why it would occasionally make "pops" going lean when held at 2000-3000 RPM. It turned out that the threads on the intake manifold that hold the fuel rail and the injector grounds were stripped, causing the ground to make intermittent connection. This was a really frustrating problem to troubleshoot, since it was so intermittent and felt like ECU or MAF sensor issues.
Cold start injector cap
I don't know the size of this fitting, but if I did it would be nice to put a fuel pressure sensor here.
Intercooler, Radiator, and Electric Fan
I used the junkyard intercooler and a new Nissens radiator from FCP Euro that had a built-in fan switch. Unfortunately, the fan switch was set at a higher temperature than the thermostat, so it pulsed the fan on and off as the car overheated. To resolve this, I wired the fan switch in parallel with a switch in the dash so the driver can force the fan on regardless of the temperature switch in the radiator. With the switch on the car seems to stay cool idling, but we haven't had it in hot weather.
I've since changed to an adjustable fan thermostat that sticks into the vanes of the radiator. So far, it seems to be working well, though the way it's wired it will keep running the fan while the car is off until the radiator cools down.
I'm not 100% sure what the model of e-fan is (I got it from a friend) but based on the size and the looks I think it's the 16-inch fan mentioned on Dave Barton's Electric Fan Page. I 3D printed little spacers to mount the fan on the radiator and drilled holes to match the radiator tabs. Unfortunately, I didn't pick up the turbo intercooler/radiator mounts from the junkyard car, so I put the stock rubber radiator mounts on the intercooler and bailing wired the radiator to the intercooler on the bottom, and "fabricated" steel mounts for the top that bolt into the original locations. My first set of 3D printed spacers wasn't tall enough, so the center of the fan chewed through the radiator and caused a leak. I replaced the radiator and printed longer spacers.
After removing the mechanical fan and clutch, I replaced the studs in the water pump pulley with M6 bolts and washers to add a little clearance and remove the hand-shredding capability of the exposed pulley studs.
Engine Control Unit (ECU) and Wiring Harness
The ECU and harness caused a lot of problems. When I embarked on the project, I mistakenly thought that the car was LH2.2 and that a simple swap of the ECU, MAF, and injectors to LH2.2 turbo parts would work. This was wrong — my car was originally LH2.0, which has the same connectors for the MAF and computer as LH2.2, but not the same pinout, meaning any computer and any MAF can be plugged into any wiring harness, but only the correct ones will work together. We plugged in the new LH2.2 MAF and computer and immediately fried the computer — in fact, we did it twice and fried two computers.
I'm lucky to have friends that swapped the LH2.2 harness with my stock LH2.0 harness while I was gone on vacation (they wanted me to stop complaining about my broken project). After the harness swap, we were finally able to get the car running.
Ignition
My car came from the factory with the Chrysler ignition system, using the computer with the vacuum line that sits on the washer fluid bottle. I swapped to a Bosch Breakerless ignition from an eighties 240 Turbo by replacing the distributor, coil, and computer. I pulled the EZK ignition computer from the donor car, but not the rest of the harness and system that I'd need to change my car to the EZK system. The Bosch Breakerless system was fairly easy to install, though I put it where the stock coil was (on the strut next to the battery) instead of where the harnessing emerged at the rear passenger side of the engine bay. The tachometer didn't work for a while because I hadn't realized that the signal wire emerged in this location. The solution was to run a tach wire from where the LH2.2 harness ended (near the wiper motor) over to the coil.
MAF (Mass Air Flow) Sensor
I used a junkyard LH2.2 MAF (whose part number ends in -007). I initially tried several MAFs, and only found success with the LH2.2 MAF. Though LH2.0, 2.2, and 2.4 have the same physical connector, they're not pin compatible and only work with their respective injection systems. The LH2.0 MAF has a metal body and case, whereas the LH2.2 and 2.4 MAFs have injection molded plastic cases. It's possible to distinguish the LH2.4 from the LH2.2 MAF because the latter has an adjustment/calibration screw.
PCV System
It took me a little while to figure out the PCV system, but it ended up being fairly easy. I used a rubber hose to connect the oil separator box (hidden under the intake manifold) to the turbo compressor inlet pipe. There's an orifice with a connector on it that accepts the hose. I'm told that the connector is for heating or atomizing the oil coming through the pipe, but I've yet to try connecting it.
I first tried cleaning out my stock oil separator box, but they're cheap enough that replacement is the best option, especially if the intake manifold is off for another reason.
Wideband O2 Sensor
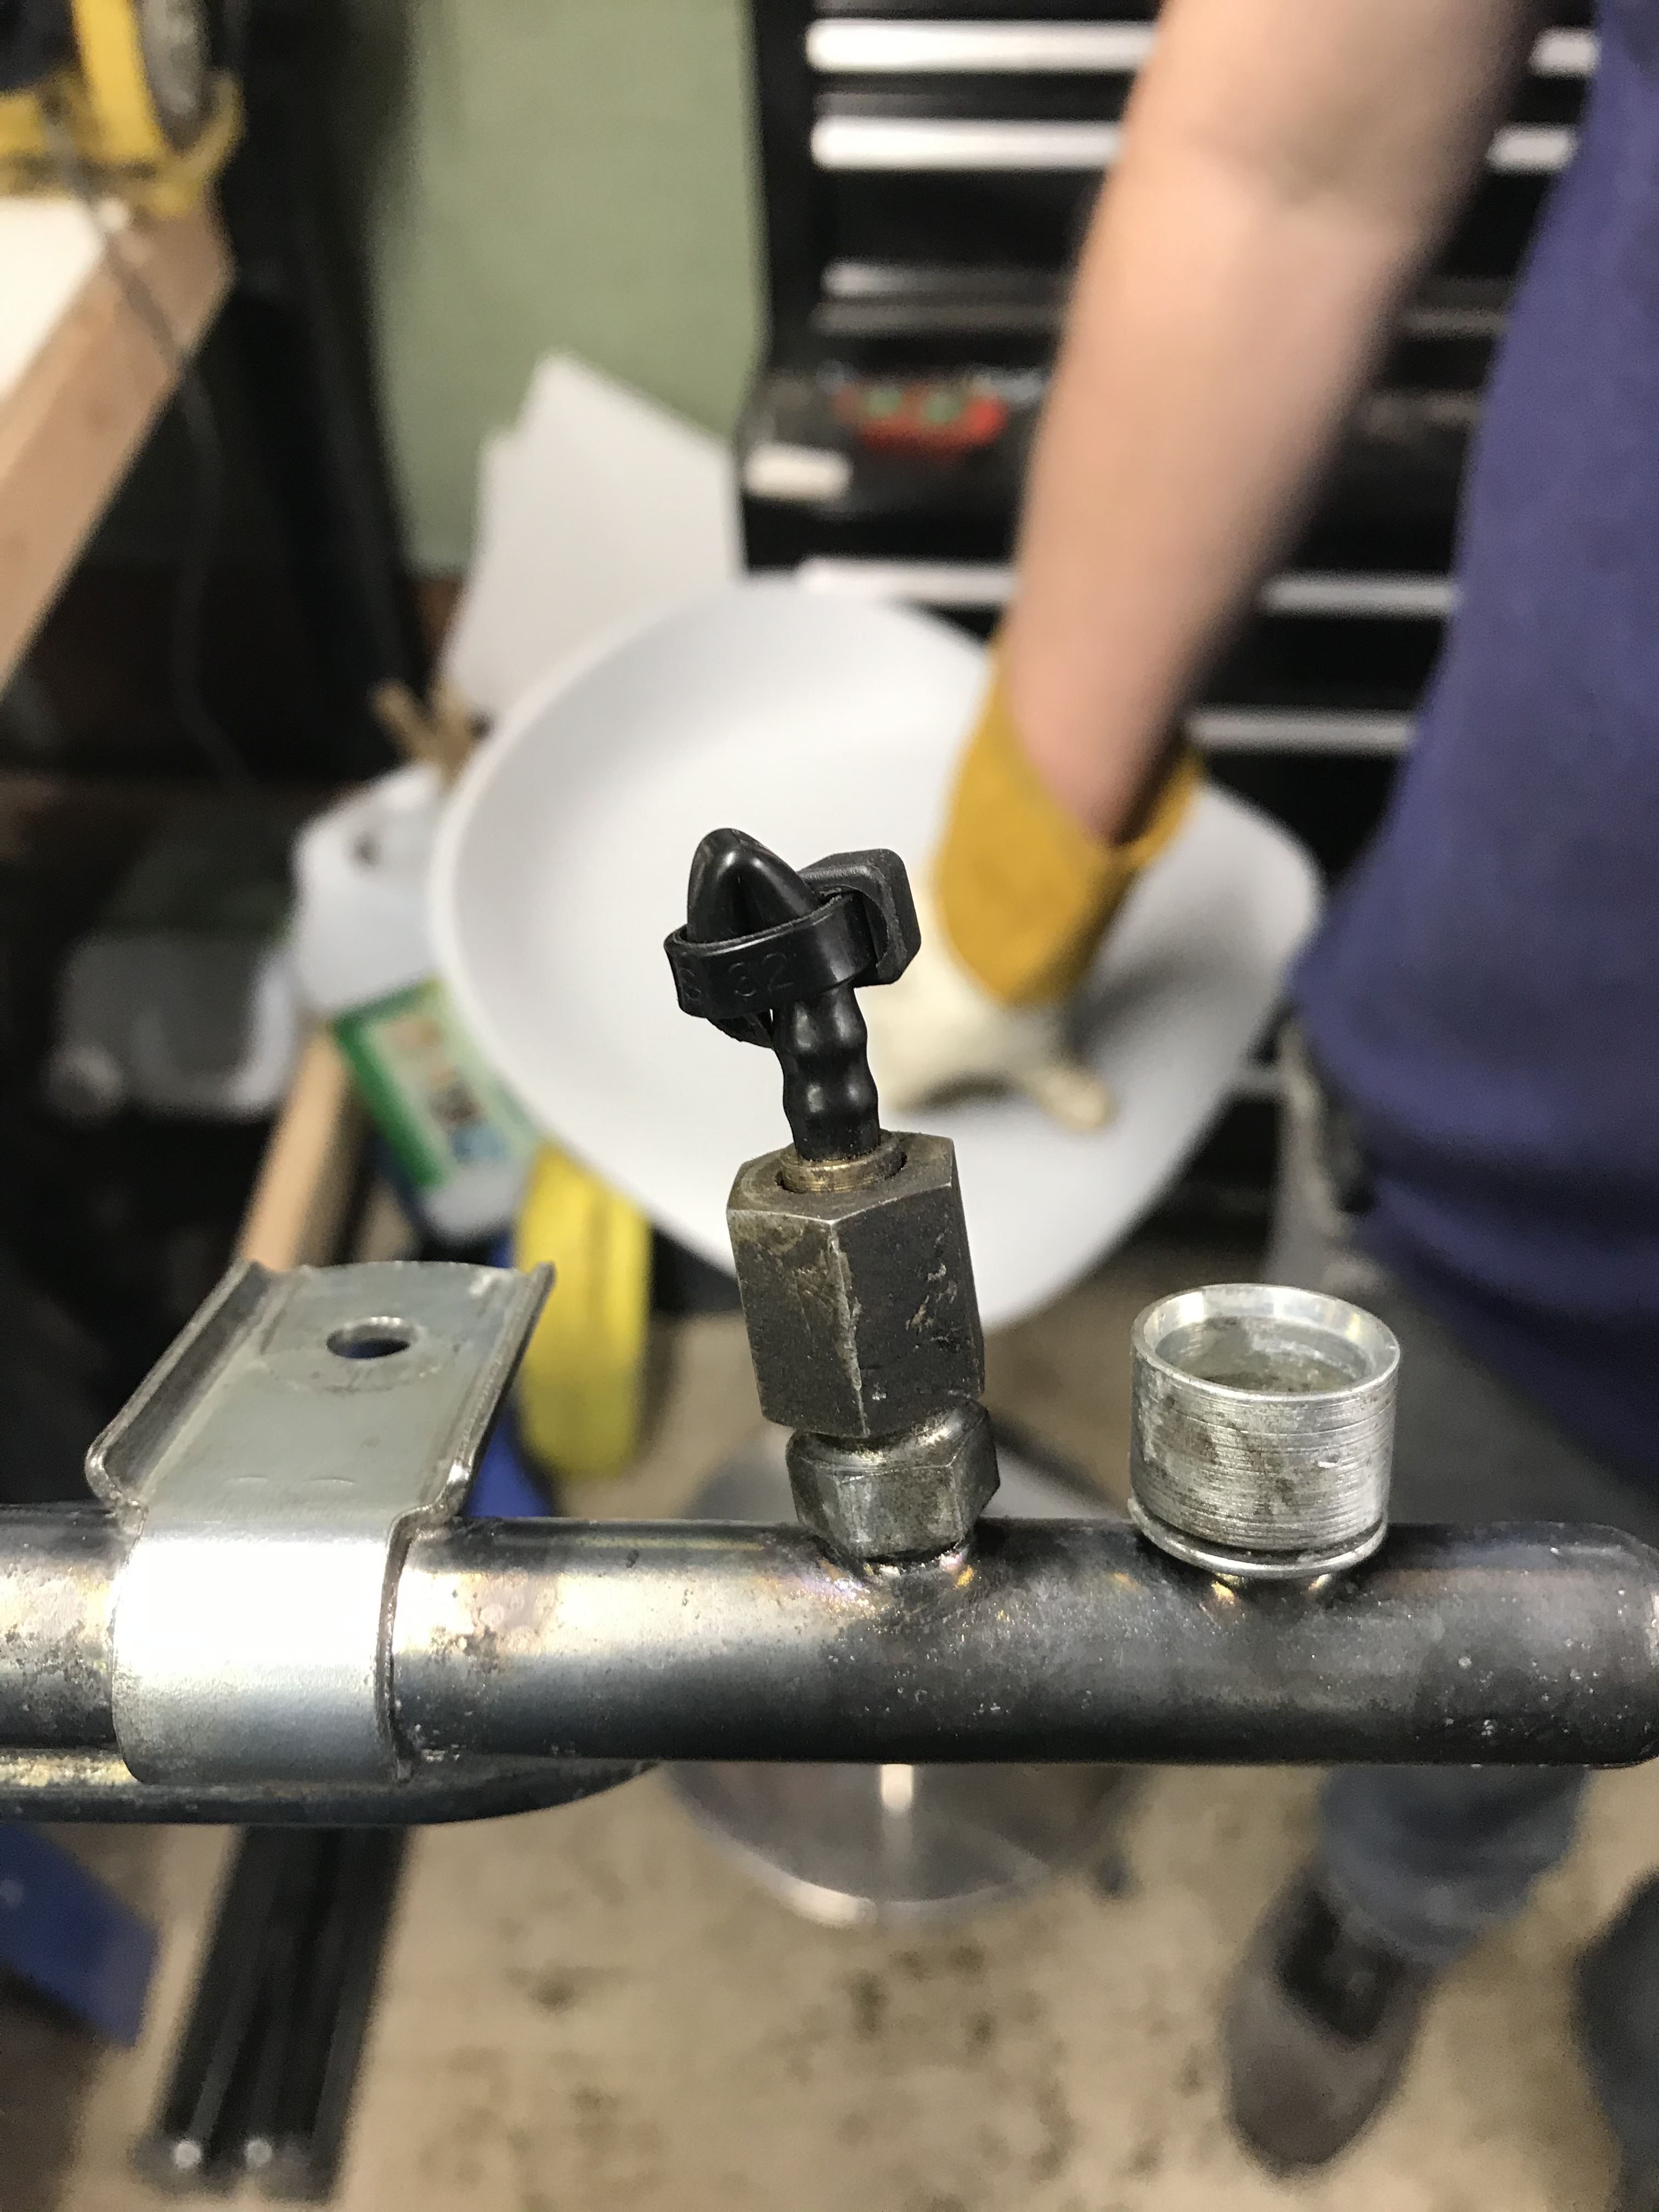
Even though I don't have huge tuning goals for this car, a wideband O2 sensor seemed like a good safety precaution and debugging tool. Knowing if the engine is running rich or lean is incredibly important for the first few runs of the engine, as well as later when trying to tune for the best performance. I bought an AEM wideband that came with a Bosch sensor and a weld-on bung. Since the 740 down-pipe had to be cut and welded shorter to clear the firewall, we used this opportunity to add the wideband bung. We positioned the wideband sensor about 12 inches down the pipe from the turbo. The narrowband sensor remained in the stock location, much closer to the turbo outlet.
Exhaust
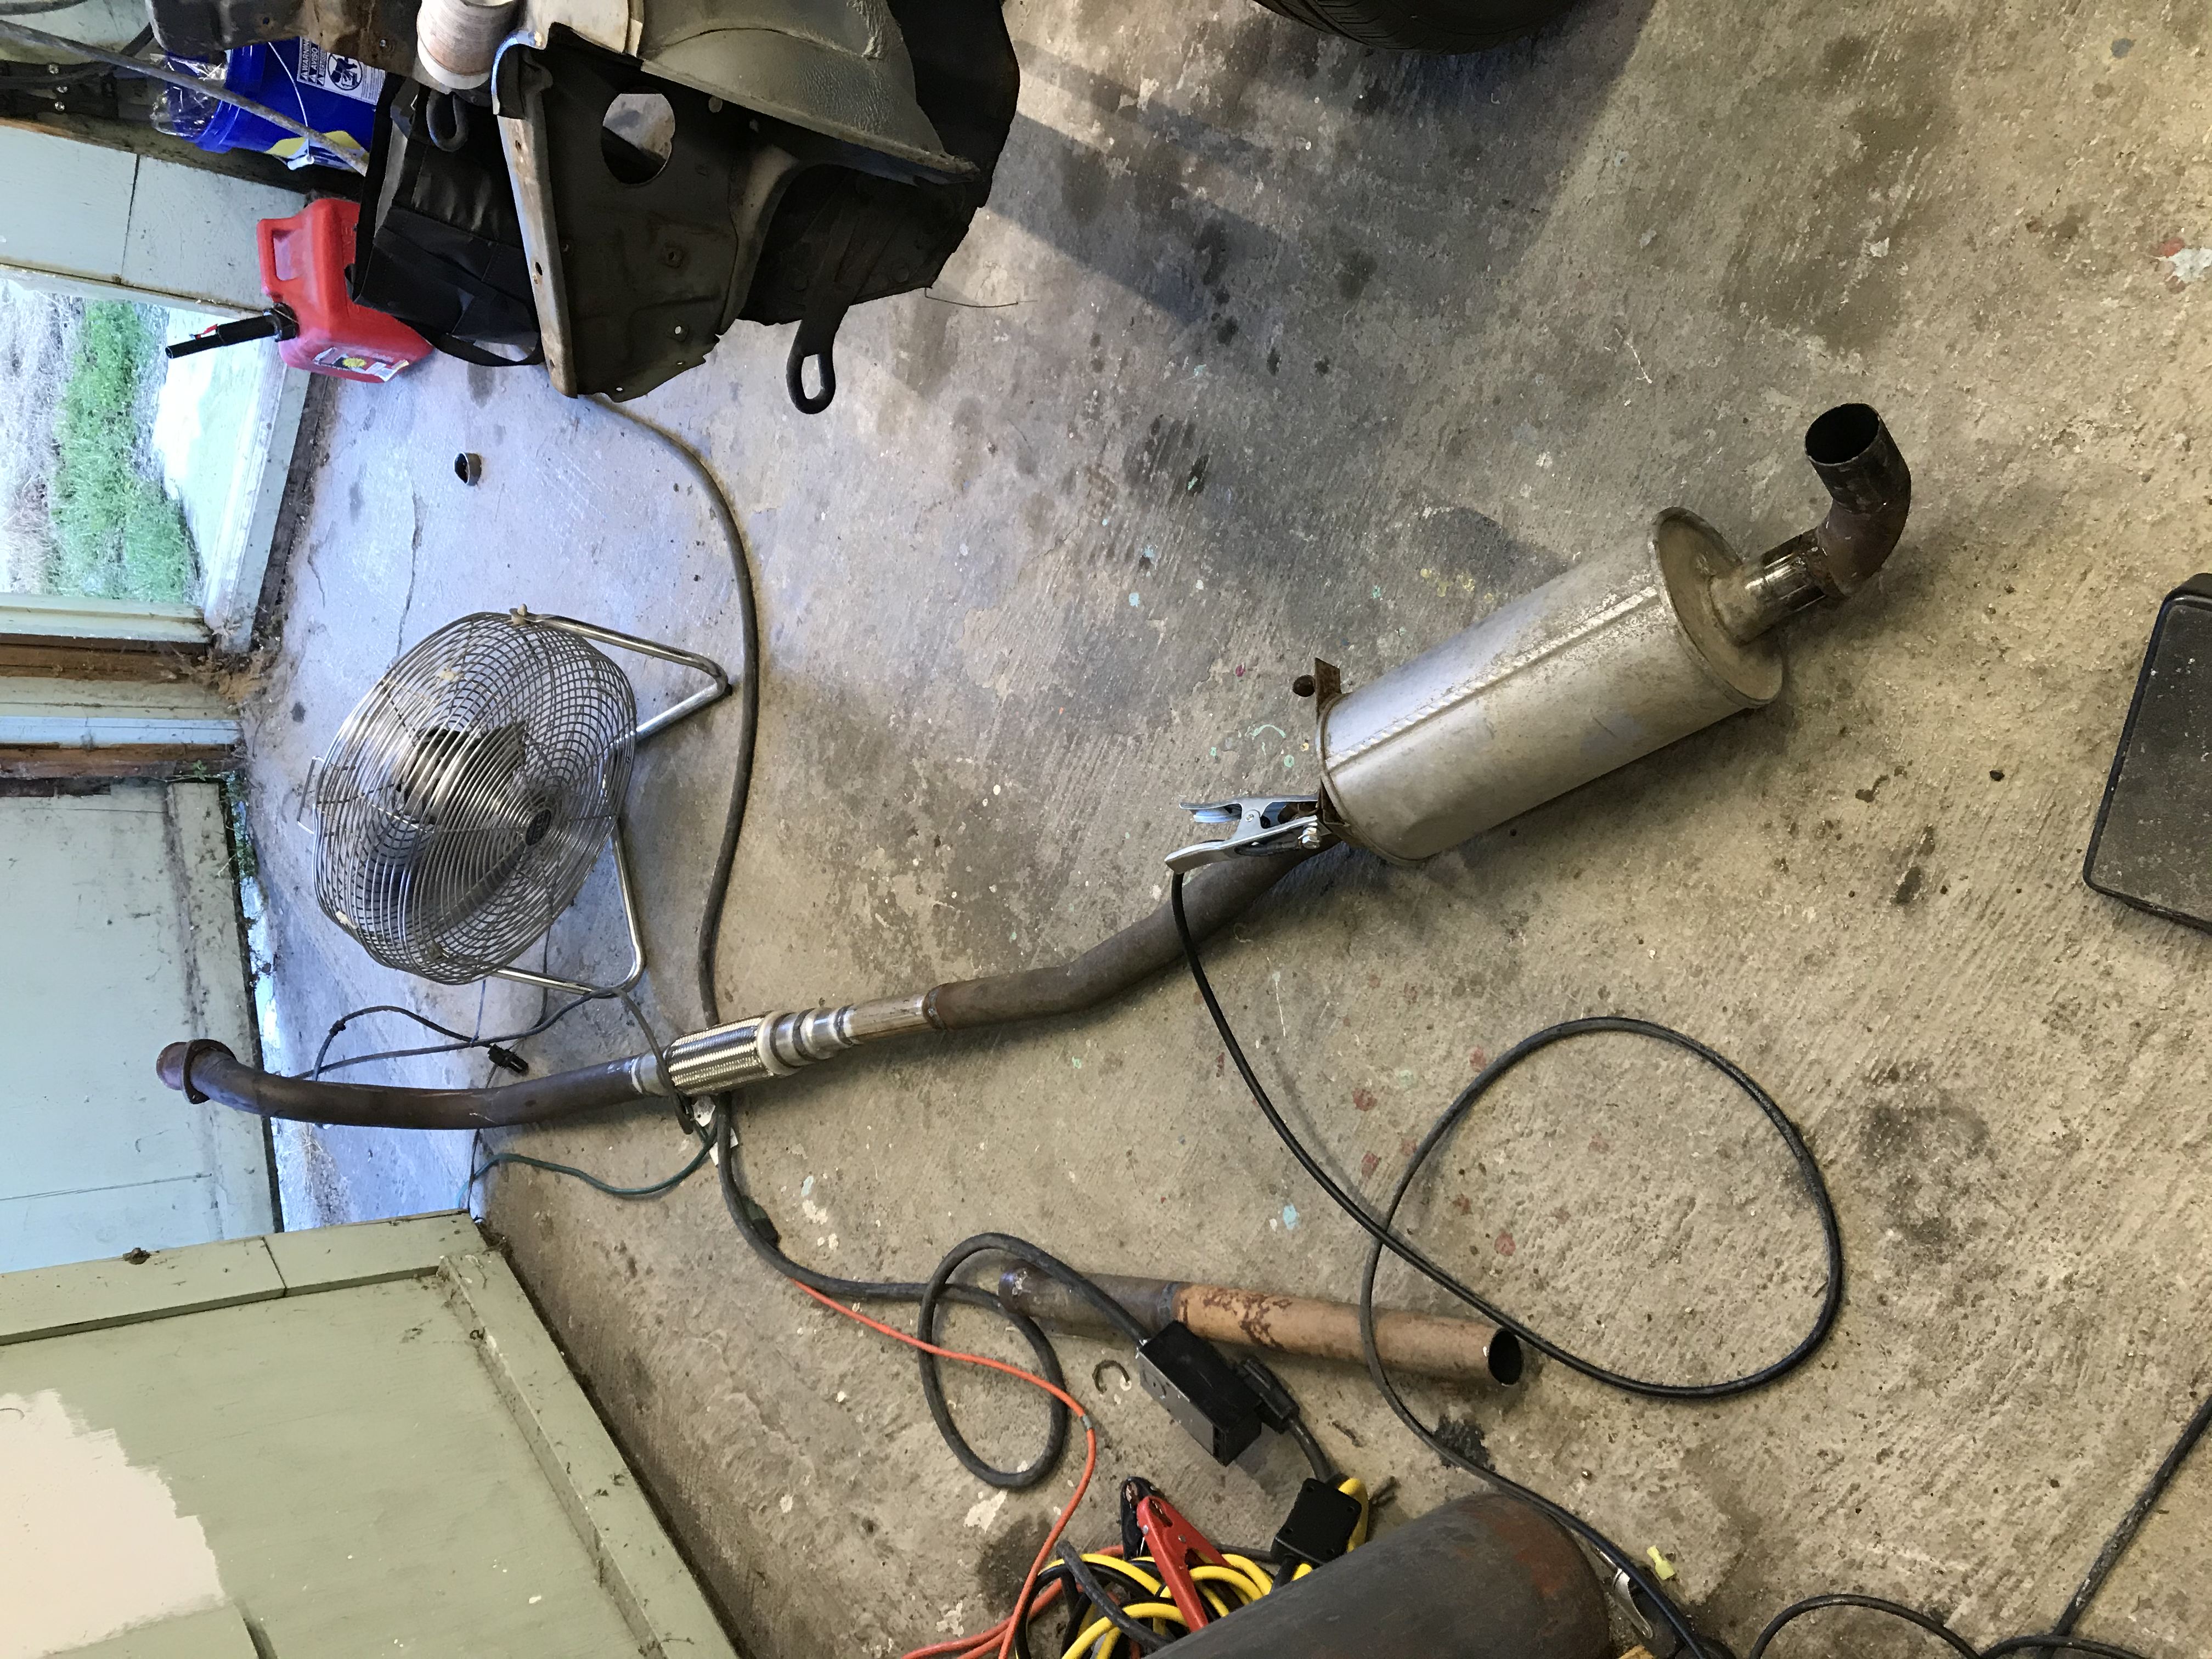
I pieced together the exhaust from several junkyard exhausts. The stock 740 downpipe has a diameter of 2.25". We cut and shortened the flat section of the downpipe right after the turbo flange but about 1" so it would clear the firewall. For several months, I drove the car with no exhaust, just an open downpipe under the passenger floor.
The open downpipe is fun for a week or two, but after a while wearing earplugs on the freeway gets annoying. I was lucky to find an over-axle 240 exhaust at Pick-N-Pull. I'm not sure if this was ever a stock option or if I was just lucky enough to find someone's custom exhaust. I decided to add a flex section after the downpipe because it seemed like a good idea—unfortunately, I misremembered the size of the downpipe and got 2.5" flex section instead of 2.25". I used a coupler to step up from the downpipe to the flex, and then another coupler to step down from the 2.5" flex section to the 1.875" stock exhaust. I used just the center muffler, since the turbo muffles some and I don't want the totally silent stock sound. Just the center muffler has a fairly conservative sound, I'd imagine running a straight pipe to the back of the car would have a more aggressive but not overly loud sound. I did notice a little less throttle responsiveness with the exhaust completed compared to the open downpipe—at some point I might install either an electric or a manual cutout before the muffler. The open downpipe is perfect for rallycross.
Exhaust in the welding process
Though it's been fixed now, we did have one serious problem (on the 2020 WA Gambler 500). The exhaust fell apart at the over-axle connection to the resonator, meaning the hot exhaust pointed directly at the fuel tank. The car would repeatedly quit running after a few minutes, especially while driving slowly. We don't have absolute proof this was the problem, but it seems likely that the exhaust and the hot weather contributed to vapor locking the motor. We cut the exhaust off during that event to get home (which did resolve the problem) and then welded it back on more securely after getting home.
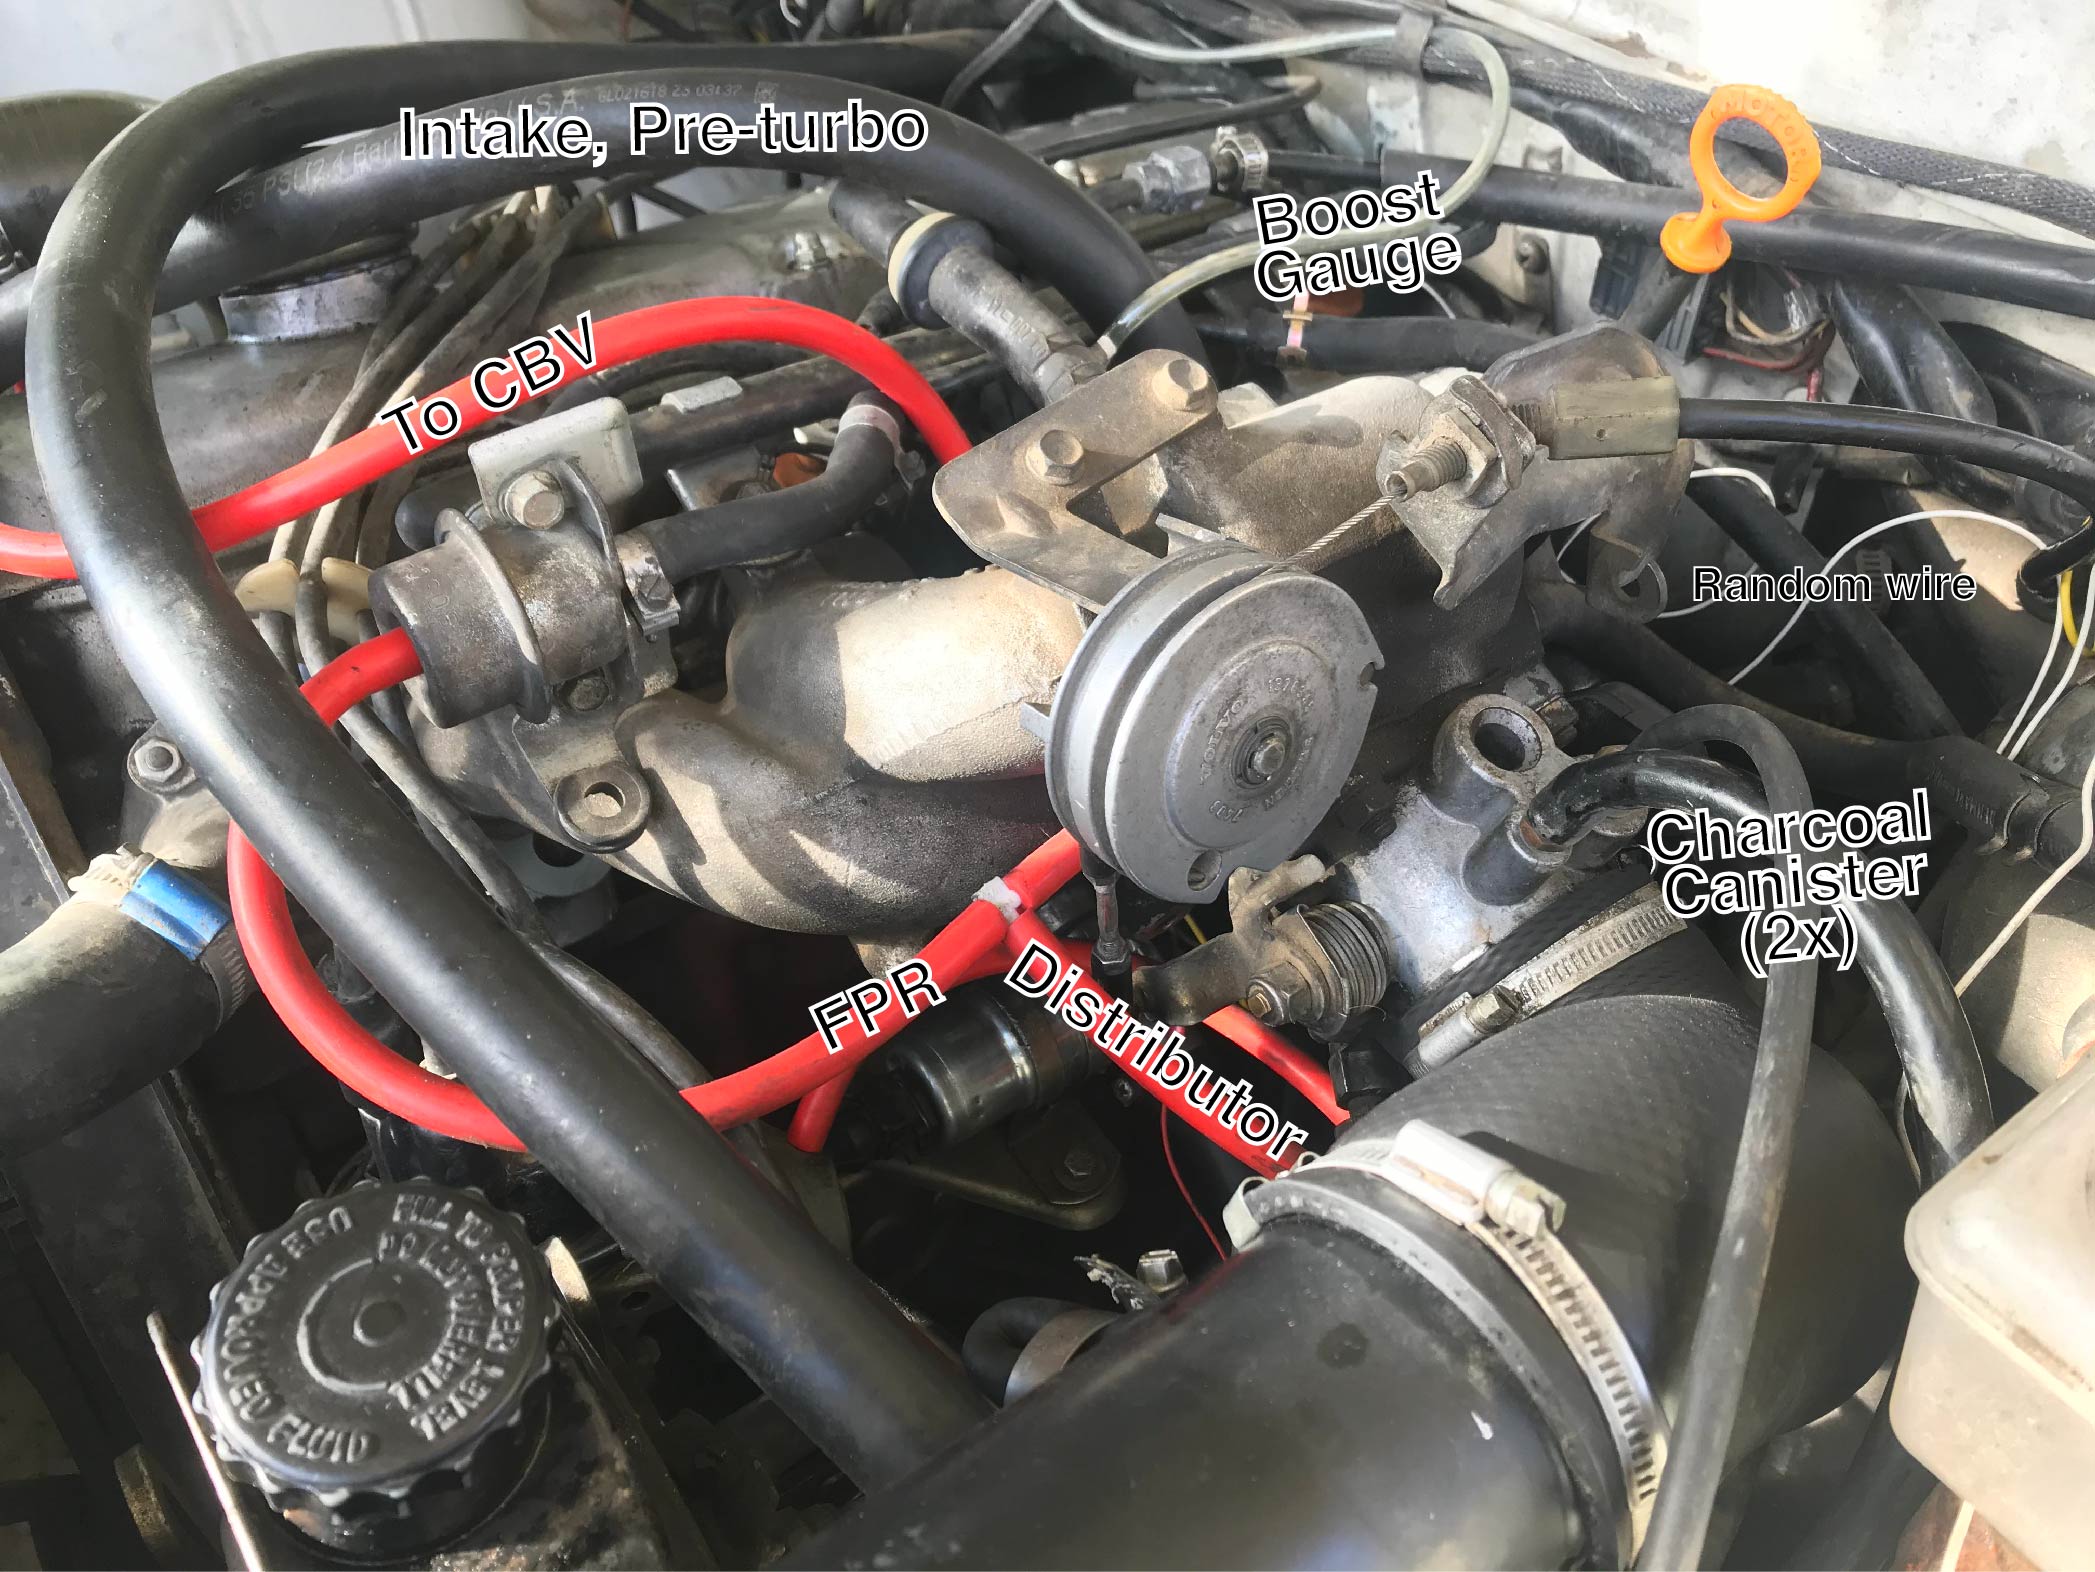
Vacuum Connections
I wanted to make a log of all the vacuum connections, because it took me a little bit to figure out where to put them. There are connections before and after the throttle body, which see vacuum at different times, and the distinction is important for some of the connections. For example, if the turbo CBV is connected to the side before the throttle body, it won't function at all, since it won't see the vacuum in the manifold when the throttle is shut.
Fun fact: while writing this section, I thought about how the vacuum advance is supposed to work and moved the vacuum advance from before the throttle body to after, using a tee from the fuel pressure regulator line. The car appears to idle a little better now. My exact setup is a little difficult because it never existed from the factory. Early 80s turbo 240s used the breakerless ignition but not LH2.2, and LH2.2 cars from the late 80s used EZK ignition.
Vacuum Connections
Before the Throttle Body
After the Throttle Body
Reverse "Budget"
Here's a rough accounting of all the parts I bought for this project.
| Item | Cost |
|---|---|
| Turbo, Manifold, Intercooler, Pipes, Oil Cooler, etc from Pick-N-Pull (50% off) | $250 |
| Bosch Breakerless Ignition, LH2.2 Harnesses, and Electric Fan from a friend | $100 |
| AEM Wideband O2 Sensor | $162 |
| Oil Pan Gasket | $13 |
| -10 AN Fittings and 10ft of nylon hose | $82 |
| Oil Feed and Drain Line Kit | $80 |
| Boost Gauge | $15 |
| Fuel Injectors | $88 |
| Exhaust Gaskets & Spark Plugs | $17 |
| BSP to AN Fitting Stack | $35 |
| Manual Boost Controller | $15 |
| Oil Sandwich Plate | $17 |
| 740 Coolant Hoses with Lines for Turbo | $30 |
| -10 AN Fittings and 16ft of nylon hose (I should've gotten this kit from the beginning) | $120 |
| K&N Cone Air Filter | $27 |
| More Spark Plugs | $10 |
| 3 Bar FPR | $13 |
| Fan Switch | $10 |
| Helicoil Kit (M8) | $25 |
| Bosch Narrowband O2 Sensor | $75 |
| Another 3 Bar FPR | $25 |
| New 740-style Coolant Reservoir | $22 |
| Nissens Radiator | $127 |
| Coolant Temp Gauge | $27 |
| Oil Temp Gauge | $12 |
List of Mistakes
Here are all the mistakes that we made that you should avoid making: